How To Grow Microgreens Without Soil – Complete Indoor Gardening Guide
All Articles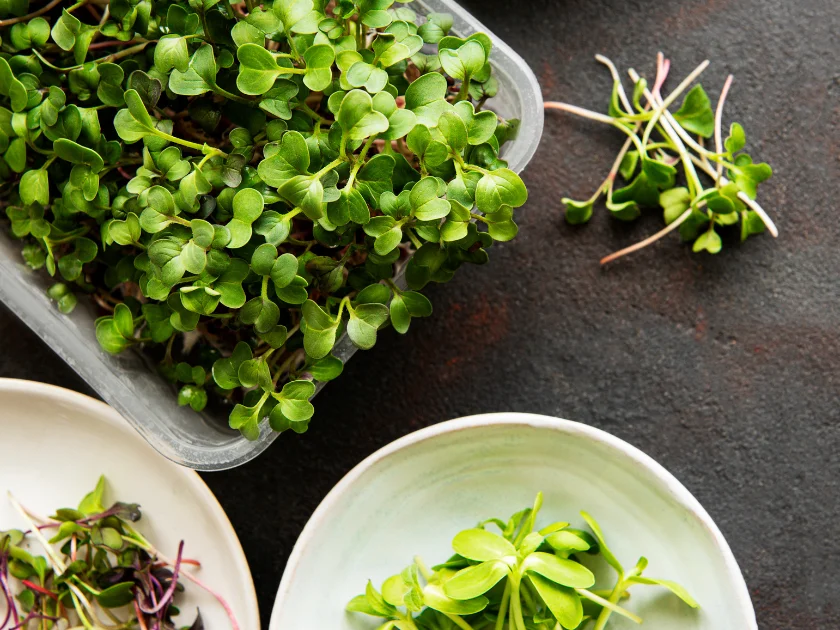
Hello! I’m Vic, the owner and chief grower at Happy Leaf LED. Today, I’m excited to share the amazing benefits of growing microgreens and provide step-by-step guidance on how to grow microgreens without soil in your indoor garden. I’ll guide you through everything you need to know—from materials needed and their purpose, how to get started and what you can expect when growing these nutrient-packed greens without soil using our Happy Leaf LED grow lights. Let’s dive in.
Table of Contents
How To Grow Microgreens Without Soil (VIDEO)
What Are Microgreens?
Microgreens are herbs and vegetables harvested within one to three weeks after planting, when the “true leaves” have formed. We can think of microgreens as immature herbs and vegetables.
Microgreen seeds and regular seeds are botanically the same, coming from the same parent plant and having the same genetic makeup. They differ in the way they are grown. Microgreen seeds are planted close to one another and harvested about 5 to 14 days after they are planted. A mature plant would take more time to grow using only a few seeds.
How do I know when they are ready to harvest?
Microgreens are typically ready to harvest within 1-3 weeks of growth, depending on the specific variety you are cultivating. For example, fast-growing varieties like radishes and broccoli can often be harvested in as little as 7-10 days, while slower-growing types such as basil or cilantro might take closer to three weeks.
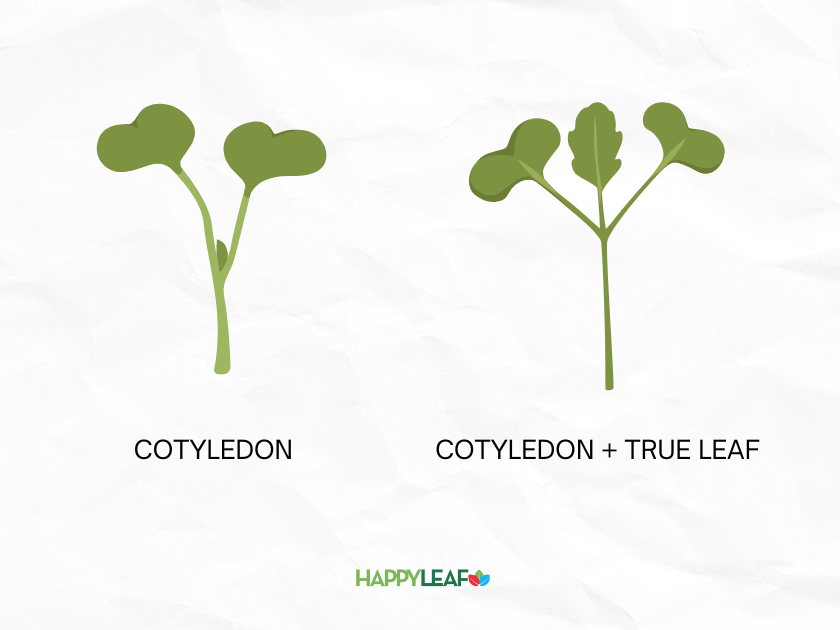
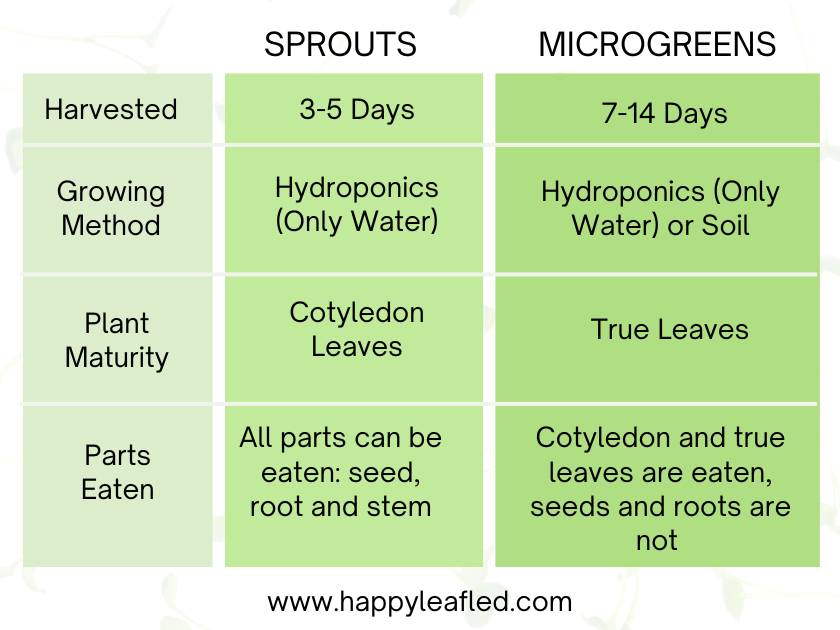
Microgreens are harvested soon after the first true leaves take shape. The true leaves are the second set of leaves that appear during growth. Herbs and vegetables start life with one or more, commonly, two embryonic leaves. They’re called cotyledon leaves.
Several days after these tiny delicate leaves pop through the surface of the soil, another set of leaves form. They are considered the first “true leaves”. When you eat microgreens, you will be dining on three components, the stems, the cotyledons, and the true leaves.
The peak flavor and nutritional value of microgreens are usually achieved when they reach a height of 1-3 inches. At this stage, the tiny plants are packed with intense flavors and a high concentration of vitamins, minerals, and antioxidants. Harvesting them at this optimal height ensures you get the best taste and nutritional benefits in every bite.
Are microgreens the same as sprouts?
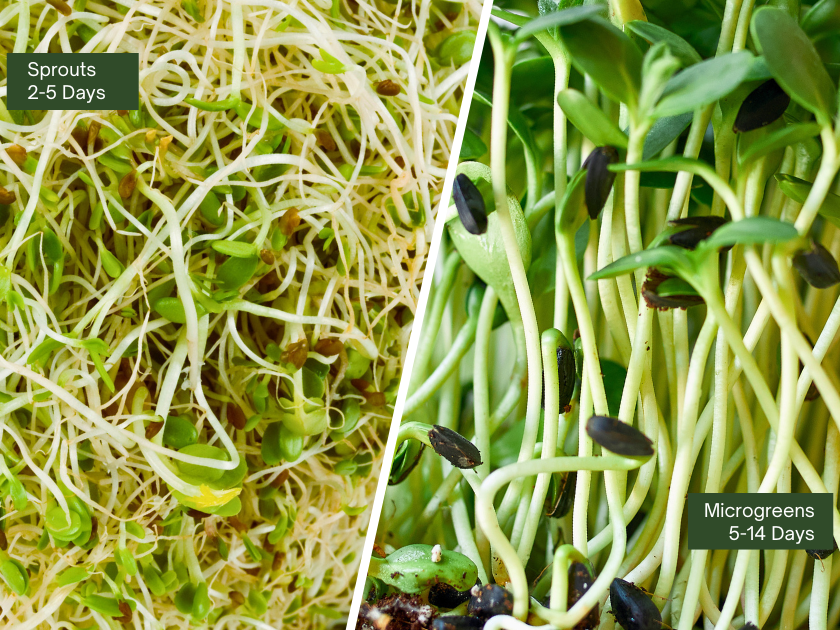
No, but they are close relatives. Sprouts, microgreens, and baby greens form a continuum from seed to mature plant.
Sprouts are veggies harvested earlier in their life cycle, notably about 3 to 4 days after sprouting. They are tiny plants with cotyledon seeds. Microgreens are typically harvested 7 to 14 days after the first true leaves form.
Do microgreens regrow?
While microgreens don’t technically “regrow” after harvesting, you can still get a second, smaller harvest from the same tray. When you cut your microgreens at the root, you create space for seeds that weren’t getting enough light to finally sprout, and for smaller microgreens to stretch out and thrive. This secondary growth won’t be as abundant as the first, but it’s a great way to maximize your yield and enjoy an extra harvest from the same planting.
How long will fresh microgreens last after they are harvested?
Freshly harvested microgreens typically remain fresh in the refrigerator for about 10 to 14 days, though this can vary by type. Hardier varieties, such as sunflower and pea shoots, can stay fresh for up to three weeks, while more delicate greens like basil might only last around five days. For optimal flavor and nutritional value, it’s best to harvest microgreens as needed. If you need to store them, keep them dry and in an airtight container with a paper towel to extend their shelf life.
Are all veggies and herbs suitable for microgreen growing?
Most herbs and vegetable seeds can be grown as microgreens hydroponically under LED grow lights. That said, some veggies work better than others. Plants in the Brassica family, such as kale, broccoli, red cabbage, and kohlrabi, for example, are microgreen superstars. They germinate well, grow quickly, and grow reliably. Other superstars are radishes, Swiss chard, beets, and arugula. We recommend that you start with these high-performance microgreens.
Benefits of Microgreens
Out of all the things I grow at home and at the Happy Leaf workshop, microgreens come in as one of my favorites. I often recommend them for beginners as you can see your results quickly, even just 1 week in some cases. Learning how to grow microgreens without soil indoors offers numerous advantages that make it an appealing option for both novice and experienced gardeners. Here are some key benefits:
Diverse and wonderful flavor
Each variety of microgreen basically has its own unique flavor, be it broccoli, kale, sunflower, peas, etc. The flavors are quite vibrant. Arugula, cress, radish, turnip and mustard greens are especially spicy and are great additions to strongly flavored foods such as pizza or tacos.
Nutrient-rich superfood
Here’s a fact that might convert you to a microgreen connoisseur. Microgreens are more nutritious than full-grown veggies. According to the US Department of Agriculture, microgreens contain, on average, five times the nutritional content of their mature counterparts. Bear in mind, that’s an average. There are many exceptions. Red cabbage microgreens, for example, contain forty times more Vitamin C and six times more Vitamin E than mature red cabbage. We recommend that you start with these high-performance microgreens.
Cost-effective
Once you learn how to grow microgreens without soil at home, it will become obvious that it is an economical choice. A $25 bag of seeds can last up to a year or two if grown diligently. This means you can enjoy fresh, nutritious greens without constantly spending money at the grocery store. The initial investment in seeds and growing materials quickly pays off with the continuous harvests you can achieve. Note that at urban farmer’s markets, we have seen a small tray of microgreens sell for as much as $25!
Space-saving
One of the greatest advantages of growing microgreens is that they require very little space. They can be grown in small areas such as kitchen cabinets, basements, or closets with the help of efficient grow lights. This makes them an ideal option for urban dwellers or anyone with limited gardening space.
The Kratky Method : Hydroponic Growing Made Simple
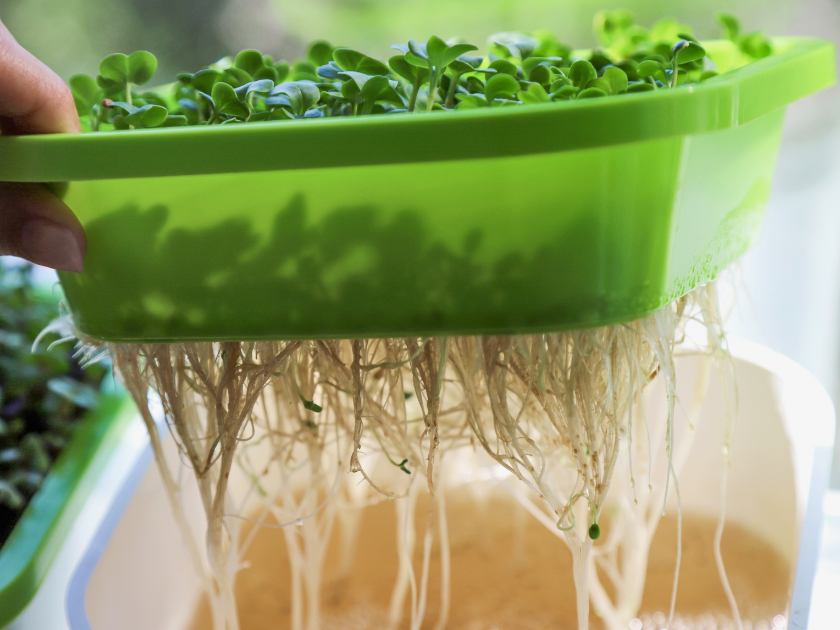
The Kratky Method, also known as passive hydroponics , Kratky hydroponics or non-circulating hydroponics is our favorite technique for growing not only microgreens but also a variety of greens like lettuce, herbs, arugula, chard, and collard greens. Developed by Dr. Bernard Kratky, who was a professor at the University of Hawaii, this method offers an efficient and cost-effective approach to hydroponic gardening.
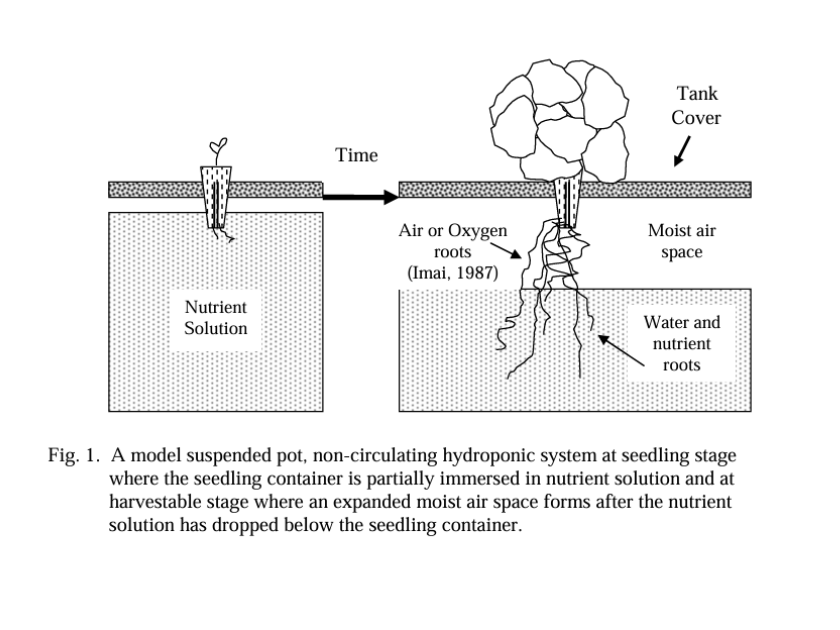
One key to the success of the Kratky Method is that plants grown in a nutrient-rich “water bath” are able to derive all the oxygen their roots need from the air space between the bottom of the tray and the water’s surface. This is a significant advantage compared to soil-based growing, where plants acquire their oxygen from air in tiny spaces between soil particles. Additionally, unlike active hydroponic systems that require electricity to pump air into the water to supply the roots with oxygen, the Kratky Method relies on natural aeration, making it simpler and more cost-effective.
So, why do we love the Kratky Method so much? First and foremost, it’s incredibly clean—no soil means no mess, which is particularly beneficial during the harvesting process. You don’t have to worry about spilling dirt everywhere, making it a hassle-free option.
Second, it significantly reduces the risk of pests. Since you’re not introducing organic matter like soil or peat moss, the possibility of bugs is greatly minimized. Third, it’s both economical and convenient. There’s no need to continually purchase bags of soil; you only need water, which is readily available in your home. It’s basically magic and it’s easy—what’s not to like?!
Why Grow My Microgreens Indoors vs Outdoors?
When it comes to growing microgreens, choosing an indoor hydroponic method over traditional indoor/outdoor soil-based methods offers several distinct advantages. Here are the key reasons to consider growing your microgreens indoors with the Kratky Method:
Cleanliness
One of the most significant benefits of growing microgreens without soil in water is the cleanliness it offers. Unlike soil-based growing, which can be messy and cumbersome, hydroponic growing eliminates the hassle of dealing with dirt. You won’t have to worry about spilling soil all over your kitchen or grow area, particularly during the harvesting process. This not only keeps your space tidier but also reduces the cleanup time, making the overall growing experience more enjoyable and less labor-intensive.
Reduced risk of pests
Growing microgreens hydroponically also significantly reduces the risk of pests. Soil and other organic matter, such as peat moss, can harbor a variety of insects and pests that might invade your growing area. By eliminating soil from the equation, you minimize the likelihood of dealing with unwanted bugs. This not only protects your microgreens from potential damage but also provides peace of mind knowing that your greens are growing in a controlled, pest-free environment.
Cost & convenience
Hydroponic growing is often more cost-effective and convenient compared to traditional soil-based methods. There’s no need to repeatedly purchase bags of soil, which can add up over time. Instead, all you need is water, which is readily available in your home. This makes hydroponic growing a more economical choice, especially for those who plan to grow microgreens continuously. Additionally, the convenience of simply turning on the faucet to water your plants cannot be overstated, streamlining the entire growing process.
What Do You Need to Grow Microgreens Without Soil?
While an initial investment is needed, many of the supplies required may already be in your home. Here, we will go over suggested materials and alternative options. We will be providing links, but we also encourage you to shop local when possible!
Microgreen trays:
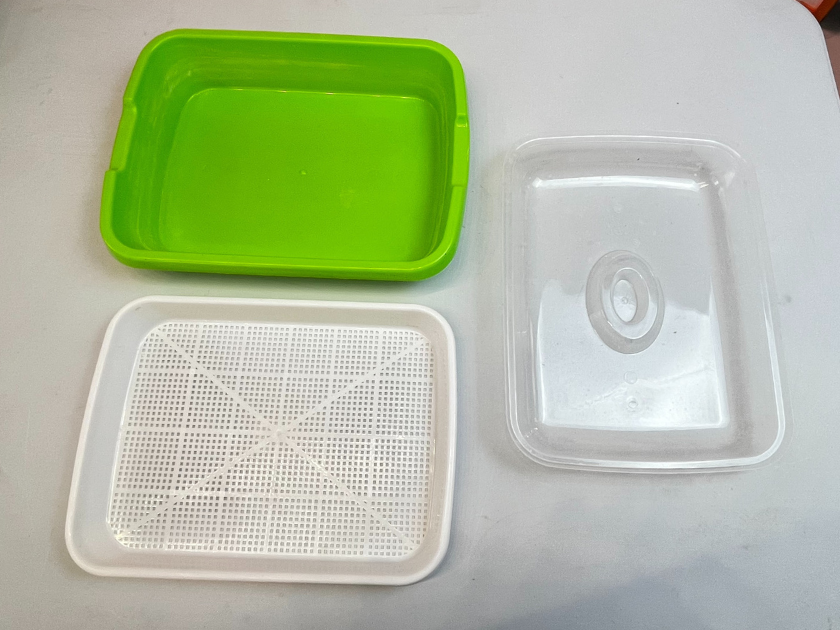
We typically use these 8×10 inch trays with mesh bottoms for proper water drainage. Ensure that whatever tray you choose comes with a lid to retain moisture during the germination period.
Grow lights:
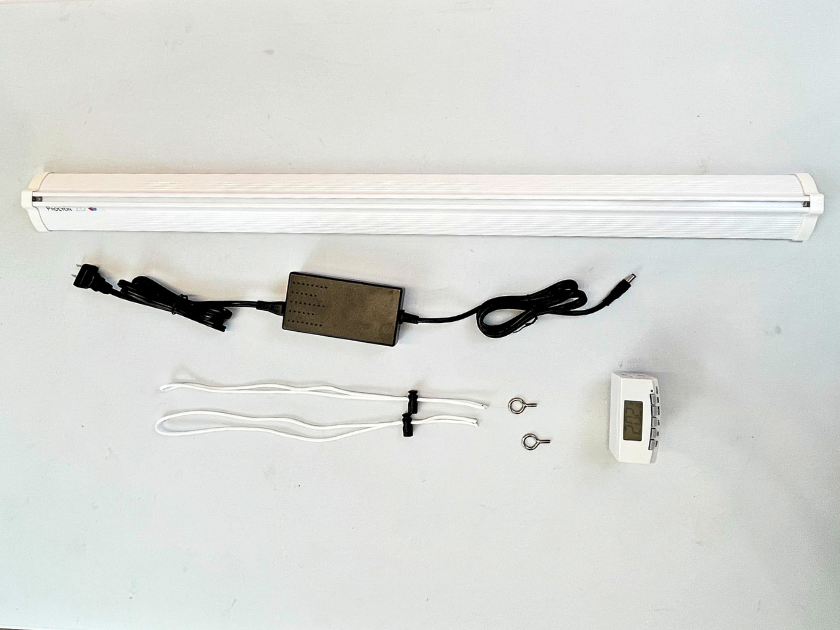
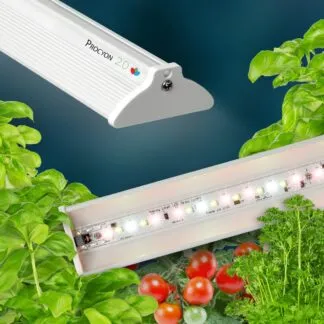
Happy Leaf offers a 17-inch and 33-inch Procyon 2.0 Full-Spectrum Grow Light. A 17-inch light can accommodate three trays, while a 33-inch light can grow up to six trays. For optimal growth, you will want to use a light with a PAR of 200 µmol/m²/s ( 20o micromoles per square meter per second). Happy Leaf lights are designed with ideal spectrums that provide optimal PAR for all growing stages, outperforming typical shop lights by giving the plants a sturdier stem as well as allowing them to grow even faster.
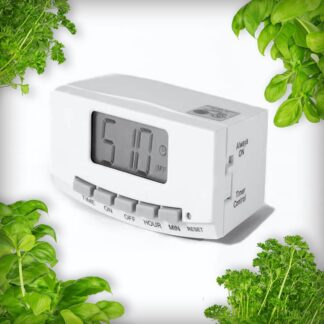
Timers : To streamline the process, we also recommend a timer for your grow light so you don’t have to try to remember to turn your light off and on. Happy Leaf carries these grow light timers, but a version of this can usually be found at many hardware and big box stores.
-
 Procyon 2.0 – Full Spectrum LED Grow Lights$97.00 – $550.00
 -
 Grow Light Timer for Indoor Gardening$12.00
Why Should I Use a Grow Light for Microgreens?
Relying on a south-facing window to grow your microgreens might seem like a good idea at first glance. After all, it’s the sunniest spot in the house, right? But here’s the thing: many modern windows, especially those with energy-efficient coatings, are designed to block a significant amount of sunlight. These Low E coatings, while great for keeping your home cool in the summer and warm in the winter, can block up to 75% of the sunlight your plants need to thrive.
Even if your windows aren’t coated, winter presents its own challenges. With shorter days and often cloudy skies, it’s tough to give your plants the consistent, high-quality light they need. A few hours of weak sunlight each day just won’t cut it, especially for light-hungry microgreens. This is where a grow light becomes a game-changer.
Using a Happy Leaf LED grow light ensures that your microgreens get the exact amount of light they need, regardless of the season or window setup. You’re not just supplementing sunlight; you’re providing a perfectly controlled environment that optimizes growth. With a grow light, you can grow not only robust, healthy microgreens but also tomatoes and succulents in the comfort of your own home and all year round! .
Want to take a deep dive into the science behind grow lights? We’ve got you covered!
Nutrients:
MaxiGro Nutrients 10-5-14 by General Hydroponics is our tried and tested hydroponic nutrient of choice. Each 8X10 tray needs about a quart of water. With MaxiGro, you only need to use one teaspoon per gallon of water, making this an economical choice at about $0.02 per tray.
There are many nutrient choices out there that require multiple parts and complex mixing recipes. MaxiGro’s one step process removes that headache and provides great results.
*If you choose to try another nutrient, just make sure you get a “hydroponic nutrient blend.”
Microgreen seeds:
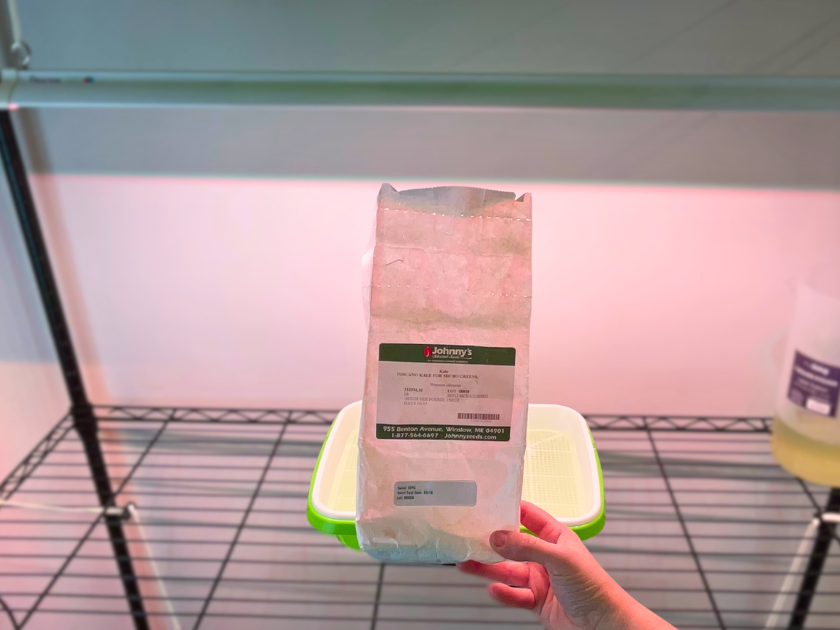
Microgreens come in all types of varieties, this diversity allows you to choose the flavors and nutrients that best suit your taste. One of our favorite places to buy microgreen seeds from is the American company Johnny’s Seeds. From my experience, Johnny’s has the largest selection of seed varieties, the option to buy in bulk or small sizes and the best prices.
Here are some of my personal favorites and great choices for beginners:
- Red Russian Kale – Mild taste, fast growing, great in salads and omelets
- Broccoli – Mild taste, fast growing, great in soups and sandwiches
- Red Cabbage – Mild taste, fast growing, great in pastas and avocado toast
- Daikon radish – Fast growing, spicy, great in sandwiches and pasta
- Purple kohlrabi – Fast growing, looks and tastes great in salads
Happy Leaf loves supporting other USA-Made businesses, and we’ve had very successful growing experiences using their products. They provide so much detail in their descriptions making it easier to decide what microgreens to grow. Johnny’s Seeds online store to learn about flavor profiles and expected harvest times on a wide variety of microgreens.
Do I need to know anything special to grow seed mixtures?
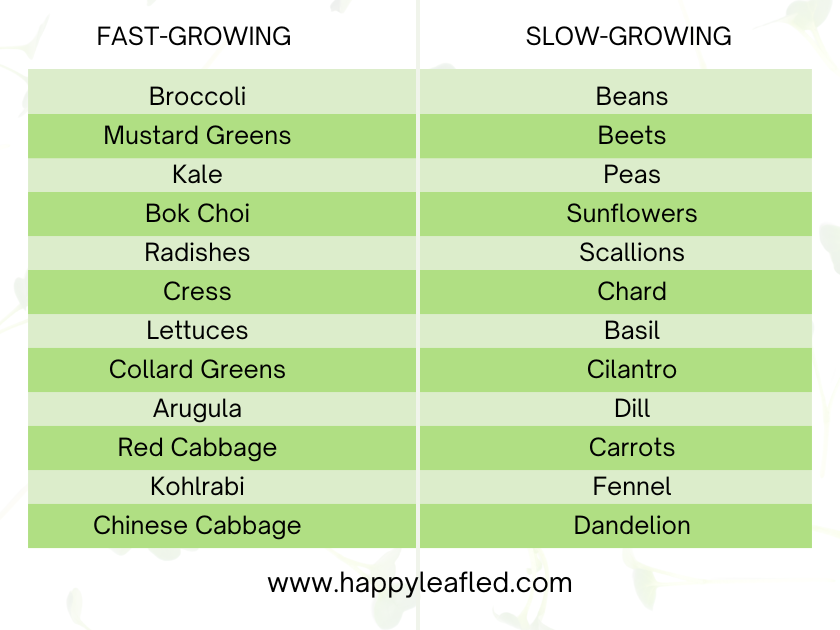
If you want to experiment with mixtures, be careful to plant a mix of seeds that grow at comparable rates. Microgreens grow at different rates. Some plants, like kale and broccoli, grow faster than others such as beets and sunflowers.
Speaking of flavors…
7 Uncommon and Delicious Leafy Green Varieties to Grow In Your Indoor Salad Garden
How To Grow Microgreens Without Soil: Complete Step-By-Step Guide
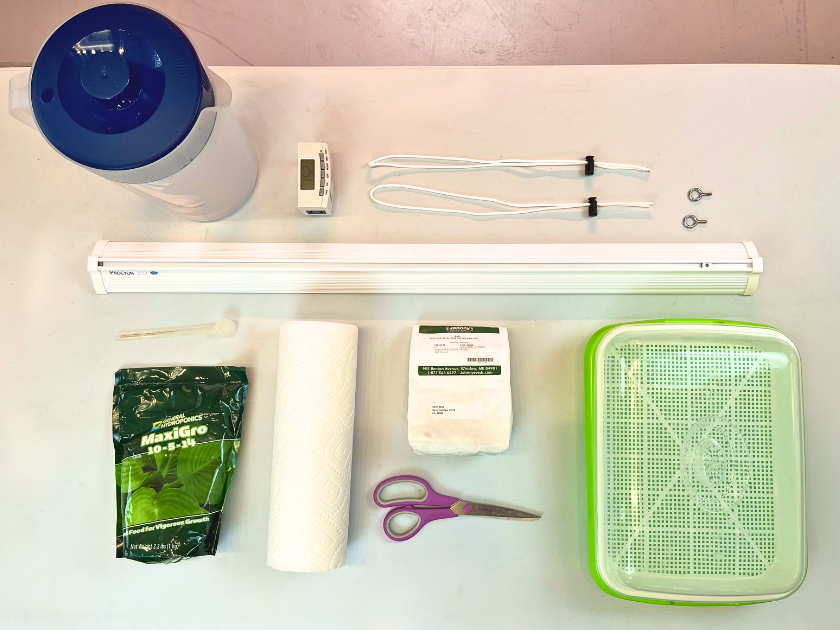
Step 1: Gather supplies
- Microgreen tray with lid
- Grow light
- Nutrients
- Seeds
- Water
- Paper towel
- Scissors
- Timer (optional/recommended)
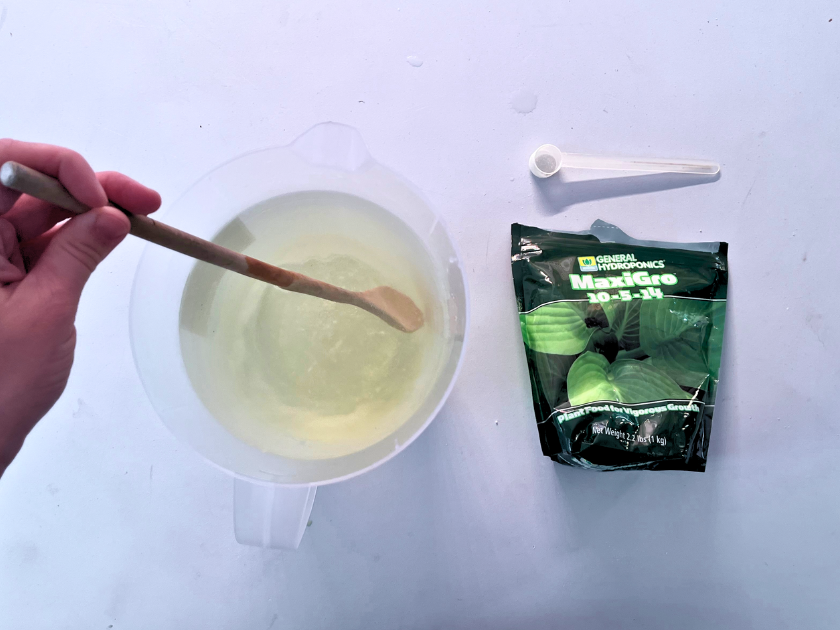
Step 2: Prepare the nutrient water
1 tsp per gallon when using MaxiGro, otherwise follow the directions on your nutrient package.
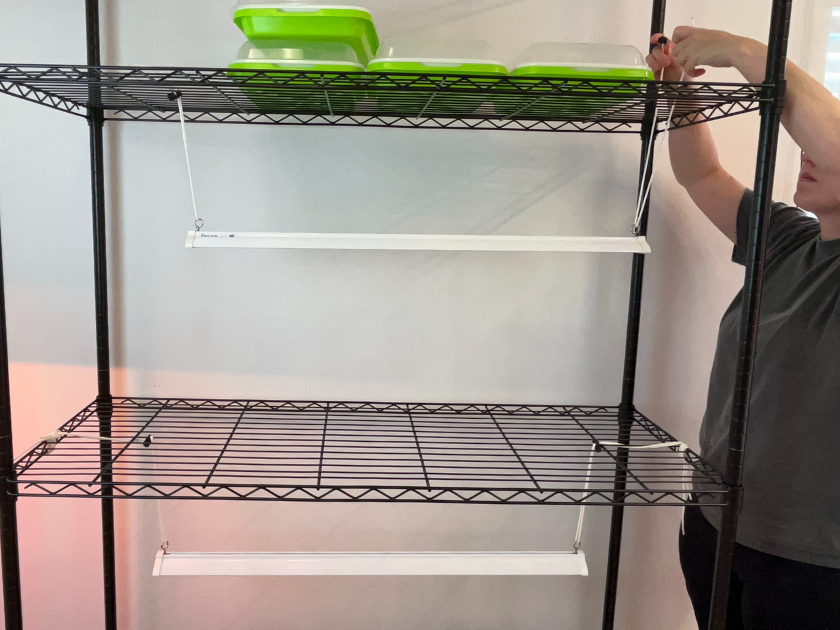
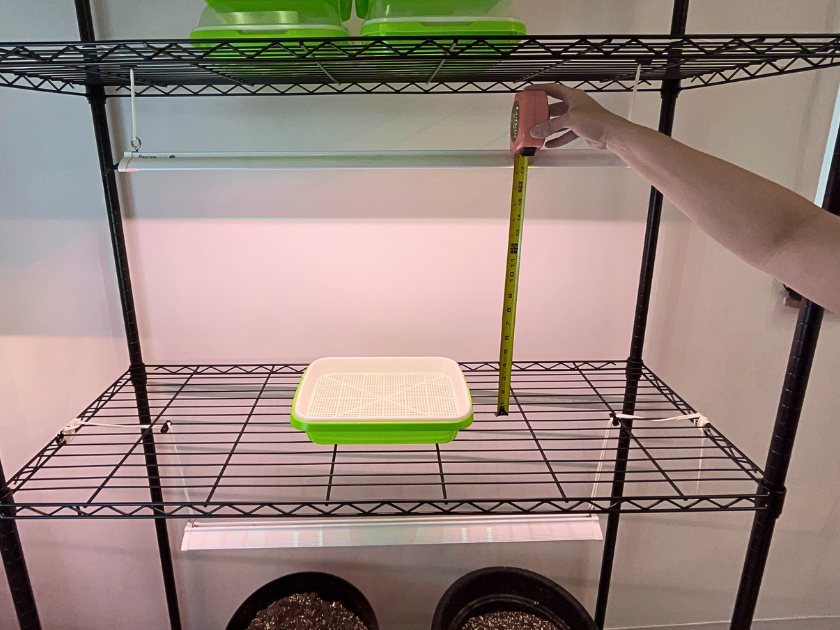
Step 3: Set up Your grow light
Hang your grow light 14”-18” from your microgreen tray.
- Grow Light Schedule: Microgreens generally require 12 -16 hours of light per day. We schedule our lights to be on for 16 hours a day (7am – 11pm) and adjust them from there. We HIGHLY recommend using a timer for your grow light to streamline the process and ensure success. No need to try and remember to turn your light off and on. You can find a grow light timer in the Happy Leaf store as well as local hardware and big box stores.
Step 4: Place and prepare microgreen tray
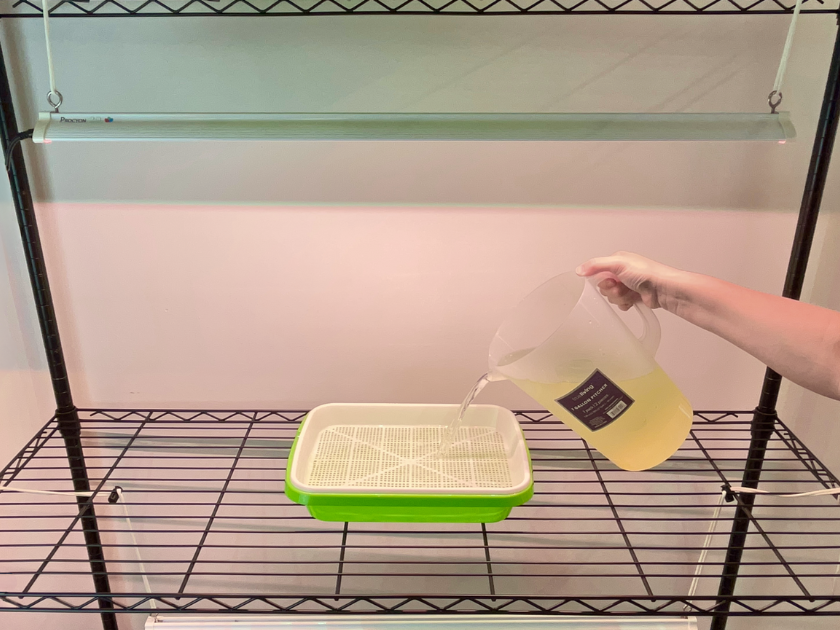
Insert the top mesh tray with holes into the bottom tray without holes and place it on your shelf or growing area under your grow light before adding water to avoid spills.
Add your nutrient filled water to your microgreen tray until the water level just reaches the top of the mesh tray. You don’t want the seeds to be completely submerged in water.
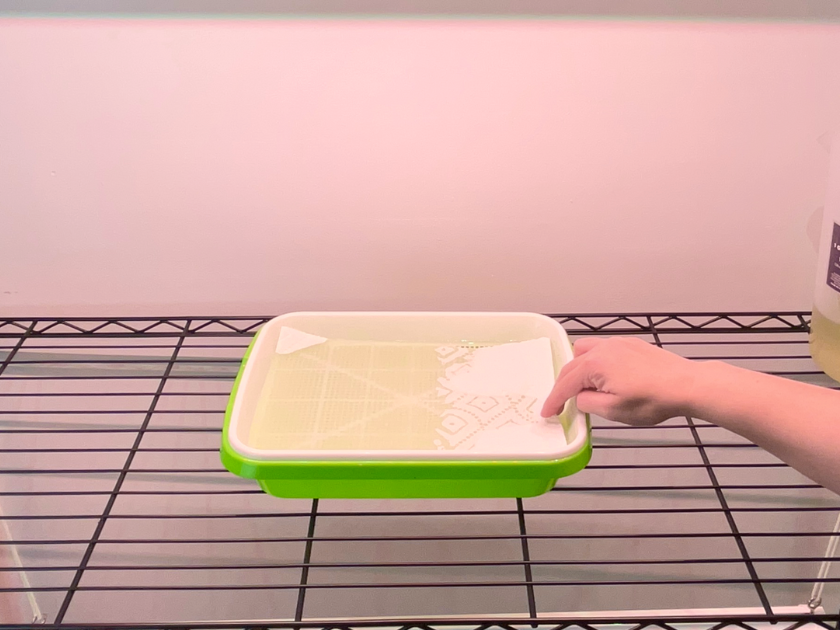
Cut a paper towel to fit the bottom of the tray to prevent seeds from falling through and place it on top of the mesh.
Step 5: Sow the seeds
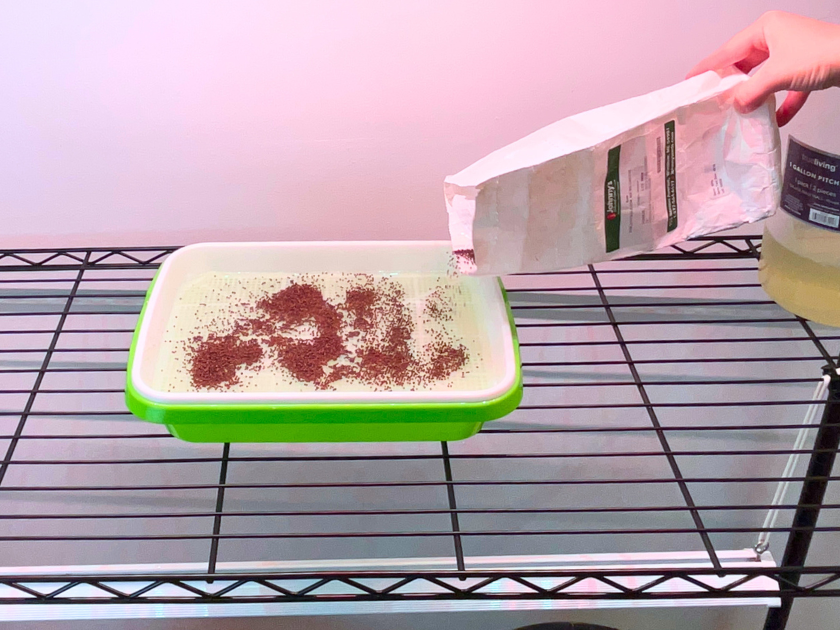
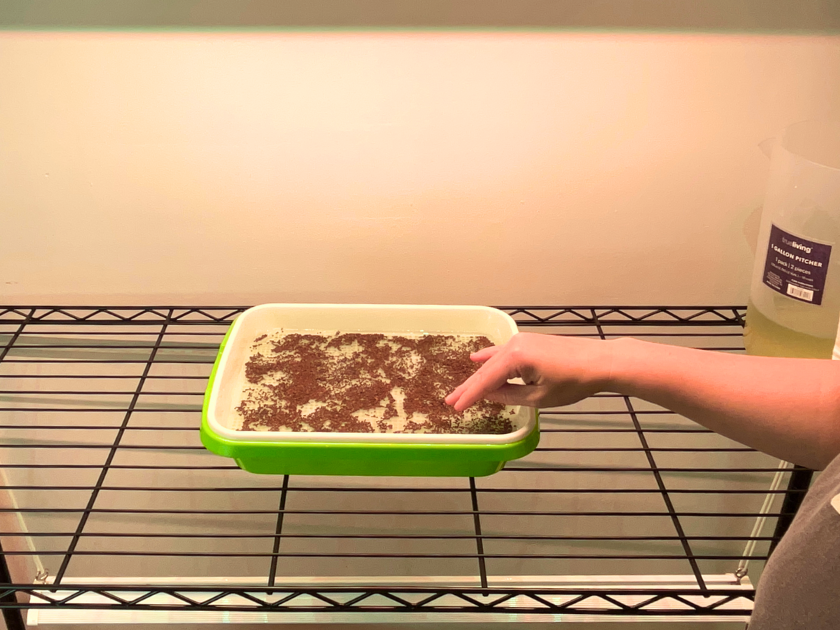
Spread the seeds evenly over the paper towel. Try to keep them about a seed-width apart from each other, but don’t stress over it too much. As long as they are not heavily clumped on one another they should be successful.
Step 6: Cover and germinate
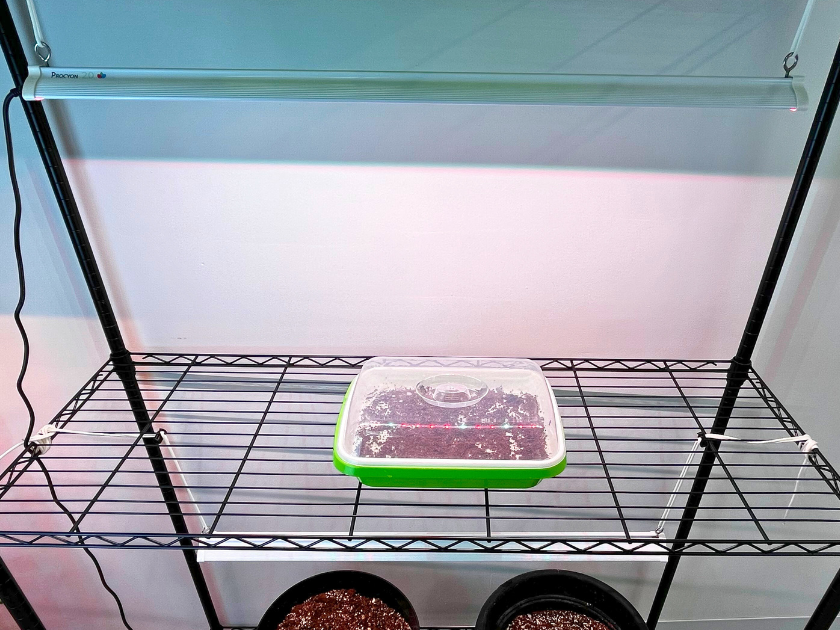
Place the lid on the tray to retain moisture during the germination process. Once the seeds start to germinate (2-3 days) remove the lid for the remainder of the growing process. Although seeds do not require light for germination, it will not hurt the process and can be beneficial to have the grow lights on from the start so you don’t forget about turning them on after a few days.
Step 7: Growth and maintenance
After the seeds have germinated (2-3 days), remove the lid and allow the microgreens to grow under the lights . Watering is minimal during the first week to week and a half. As the microgreens mature, add nutrient water as needed without overfilling to ensure the roots get sufficient oxygen. As long as the roots are touching water, the microgreens will be able to absorb what they need.

How To Harvest Microgreens
Microgreens are typically ready to harvest within 5-14 days of growth and should be harvested once they reach a height of 1 to 3 inches , which is when they are most flavorful.
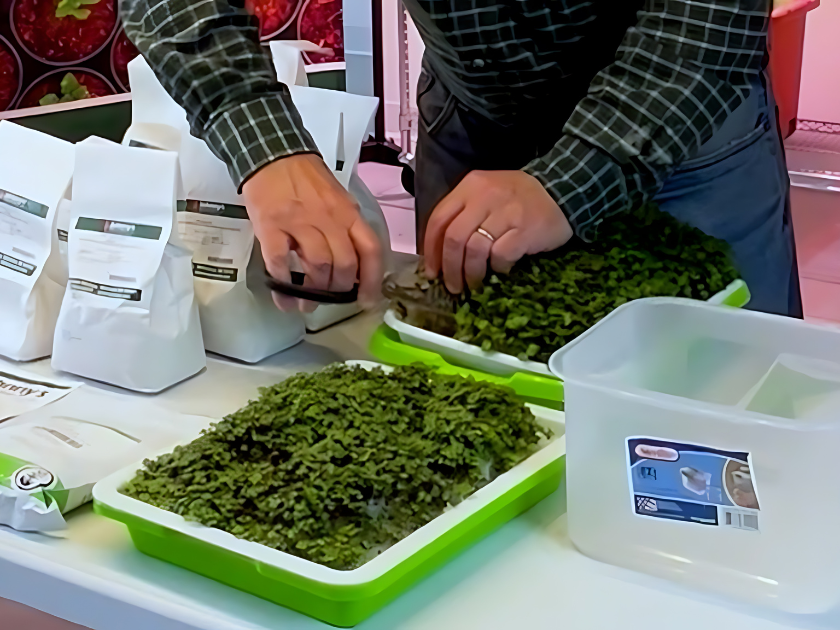
Harvest: Use scissors to cut the microgreens just above the root level. Leave the roots in the tray.
Second Harvest: While the cut microgreens will not regrow, any immature plants or seeds may continue to grow, allowing for a second, smaller harvest.
How to Clean and Reuse Supplies
After you have harvested your microgreens, it’s time to start a new grow, but first, let’s clean our supplies.
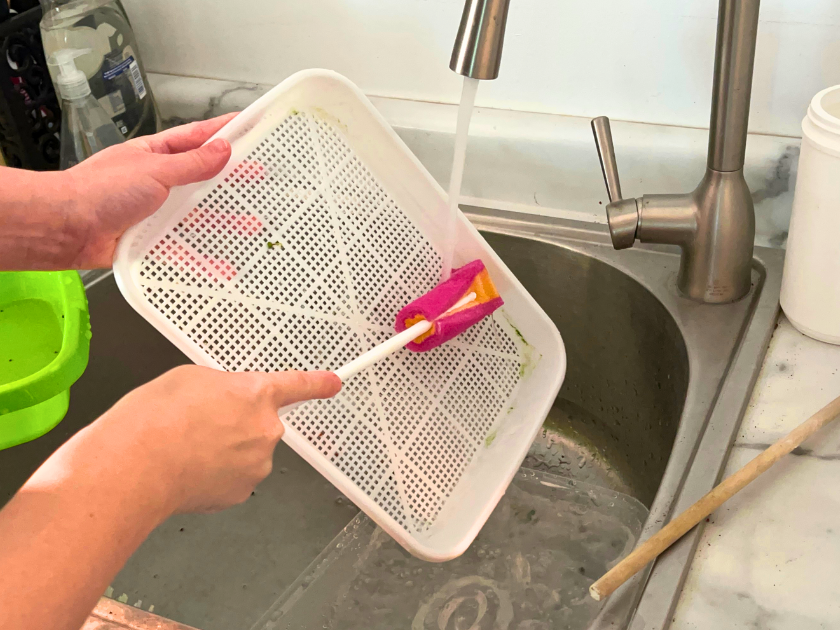
Remove all debris and plant residue from the trays. Rinse the tray under hot water and use dish soap and either a sponge, brush, or paper towel to scrub the trays and remove any leftover seeds, or roots. Rinse til clean and let your tray air dry.
We typically stop there, but if you’d like to sanitize your trays:
You can use one of the following methods:
- Boil: Boil tray in water for 3 minutes.
- Spray: Mix equal parts white vinegar and water in spray bottle and spray on tray. Rinse after 10-2- minutes.
- Soak: Soak trays in 1 part hydrogen peroxide to 10 parts water for 10-20 minutes.
Rinse trays thoroughly with clean water and let dry before using.
And that’s pretty much it! You’re off and running and ready to start a new tray and you’ll want to show your friends and family how to grow microgreens without soil !
Can You Eat Microgreen Roots?
While microgreen roots are technically edible, we don’t recommend consuming them. In hydroponic systems, like the ones used with Happy Leaf LEDs, the roots remain exposed to water and nutrients rather than soil. However, even in these clean environments, roots can still be vulnerable to bacteria, mold, and other microorganisms that thrive in moisture-rich conditions. Consuming the roots could increase the risk of ingesting these contaminants.
The best part of the microgreen for consumption is the stems and leaves, which are packed with nutrients and vitamins. We recommend harvesting your microgreens by cutting just above the root line, ensuring you get the safest, most nutritious portion of the plant.
As for the roots, while they aren’t suited for consumption, they don’t have to go to waste. After harvesting, the leftover roots from your hydroponic grow can be composted or used as organic matter in your garden.
How to Use Microgreens [5 Free Recipes]
Subscribe to our newsletter for 5 free microgreen recipes and be the first to know about new blog posts, videos, recipes and deals from Happy Leaf LED.
Microgreens are versatile and can be used in various dishes:
- Salads: Add a handful to your salads for a nutritional boost
- Garnishes: Use them to top off soups, sandwiches, and main dishes.
- Smoothies: Blend them into your favorite smoothies for extra vitamins and minerals. Bonus, add some edible flowers for an aesthetic and delicious treat!
Common Issues and Solutions
Can I eat microgreens if they grow past 3 inches? Yes, you can eat microgreens even if they grow past 3 inches, but their texture and flavor may change. As microgreens grow taller, they start to resemble baby greens and can become tougher and less tender. The flavor might also become more intense or bitter, depending on the variety.
Wilting: Microgreens may wilt if they aren’t getting enough water or if they’re overwatered, leading to root rot. Proper watering is key to keeping them healthy. remember, don’t refill the water in the tray all the way, the top of the roots need to be able to reach the air.
Legginess: If the stems are long and spindly, your microgreens may be stretching for light, try lowering your grow light or placing something under your tray to raise the height. A distance of 14-18 inches is ideal for microgreens.
Slow Growth: If your microgreens are growing slower than expected, it could be due to stress from unfavorable conditions such as temperature, or an inadequate grow light schedule. Aim to run your grow light for 16-18 hours a day.
Mold or Fungal Growth: This can occur if there is too much moisture and poor air circulation. This is most likely due to filling your tray with too much nutrient water and not allowing air flow to the top of the roots of your microgreens, essentially “choking” the roots. As long as the roots are touching the water, they are getting what they need.
Urban Microgreen Farming
Urban farming is revolutionizing food production, and companies like Urban Greens – Minneapolis, MN, Closed Loop Farms – Chicago, IL and Contemporary Farmer Inc. – Chicago, IL are leading the way in modern food cultivation using Happy Leaf LED grow lights. Visit our commercial LED grow lighting page or watch some testimonial videos to learn more.
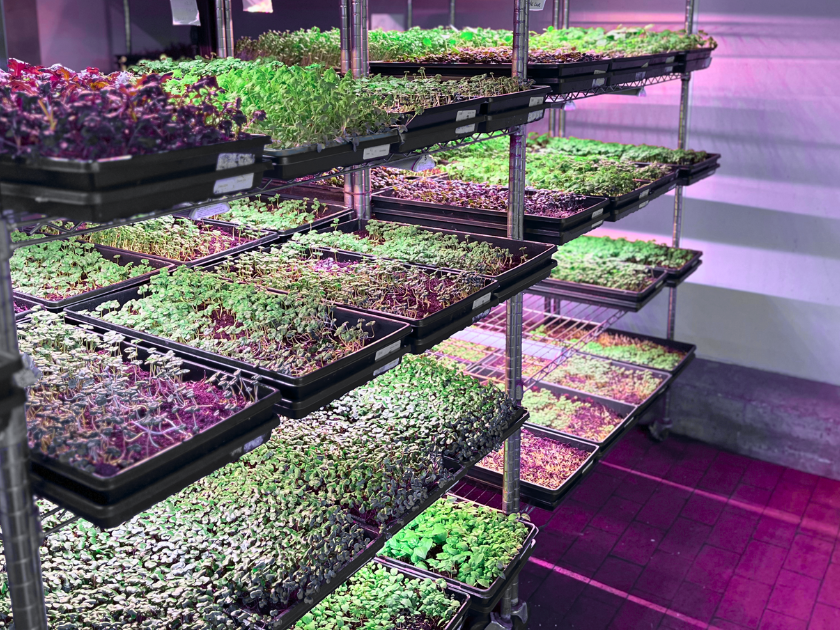
Do you have an indoor growing operation or are thinking about starting one? Contact us today for a free grow light consultation.
Conclusion
Learning how to Grow microgreens without soil indoors is a simple and rewarding process that can provide a continuous supply of fresh, nutritious greens. Whether you’re a gardener, home cook or looking to start a small business, microgreens offer a versatile and profitable venture.
For more information and resources on indoor gardening, check out our book, Grow Lettuce in Your Living Room , and read through the Happy Leaf blog.
Subscribe to our YouTube channel for more indoor grow light gardening gardening tutorials and inspiration.
