Posted on

How to Care for and Propagate Succulents Successfully with LED Grow Lights

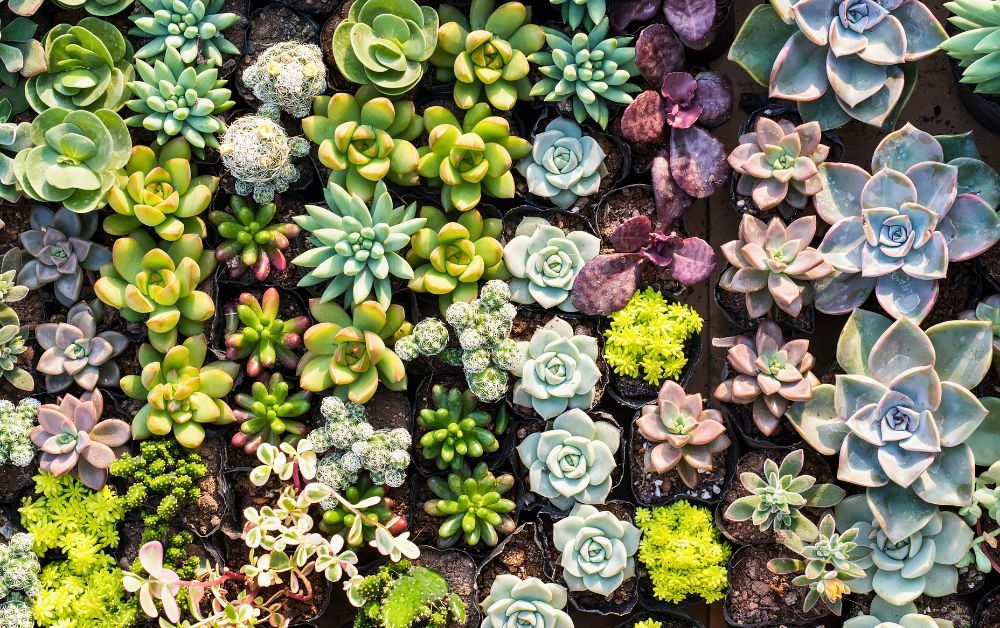
a group of succulent plants

Bringing Sunshine to Your Indoor Succulents

a group of succulent plants

Succulents, with their vibrant colors and diverse shapes and sizes, make charming and sometimes arresting additions to any indoor space. However, their natural desert habitat often clashes with the limited sunlight available inside our homes. This is where Happy Leaf LED grow lights come in, offering a solution to mimic sunlight , keep your succulents thriving, and make it easier to care for and propagate succulents.

Choosing the Right LED Grow Lights for Succulents:

Not all LED grow lights are created equal for succulents. Happy Leaf LEDs promote optimal growth, are helpful in promoting the coloring of succulent plants, and offer a full spectrum output, mimicking natural sunlight and providing the essential wavelengths for photosynthesis. 

Setting Up Your Indoor Oasis & LED Grow Lights for Succulents that STUN:
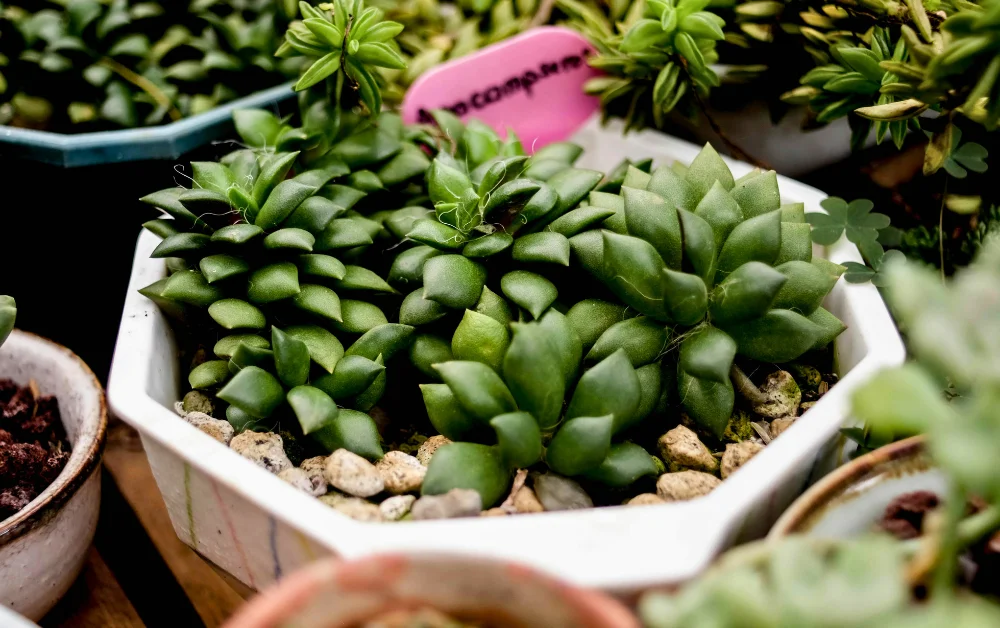
a group of green succulent plants in pots

1. Find the Perfect Spot: Choose a well-ventilated location(s) in an area that will show off your exquisite succulents. The space should be able to accommodate your plants, the light(s) and, perhaps, have the potential for growth. It’s important to consider that some succulents can grow quite large.

2. Potting and Soil: Use pots with drainage holes to prevent waterlogging, a leading cause of succulent rot. Opt for a well-draining cactus mix or create your own by combining potting soil with perlite or pumice for added drainage.

3. Positioning the Grow Light: Ideally, the light should be 12-24 inches above the plant, depending on the light’s strength. Adjust the distance based on any heat emission, ensuring the leaves don’t feel hot to the touch.

4. Lighting Schedule: Mimic natural daylight by providing 12-14 hours of light per day and 10-12 hours of darkness. Timers can be helpful for maintaining this consistent schedule.

South facing windows aren’t quite cutting it.

Explore the vital role of Daily Light Integral (DLI) in plant growth, comparing South Facing Windows to high-quality Grow Lights.

Grow Lights vs Sunlight

Caring for Your Indoor Succulents:

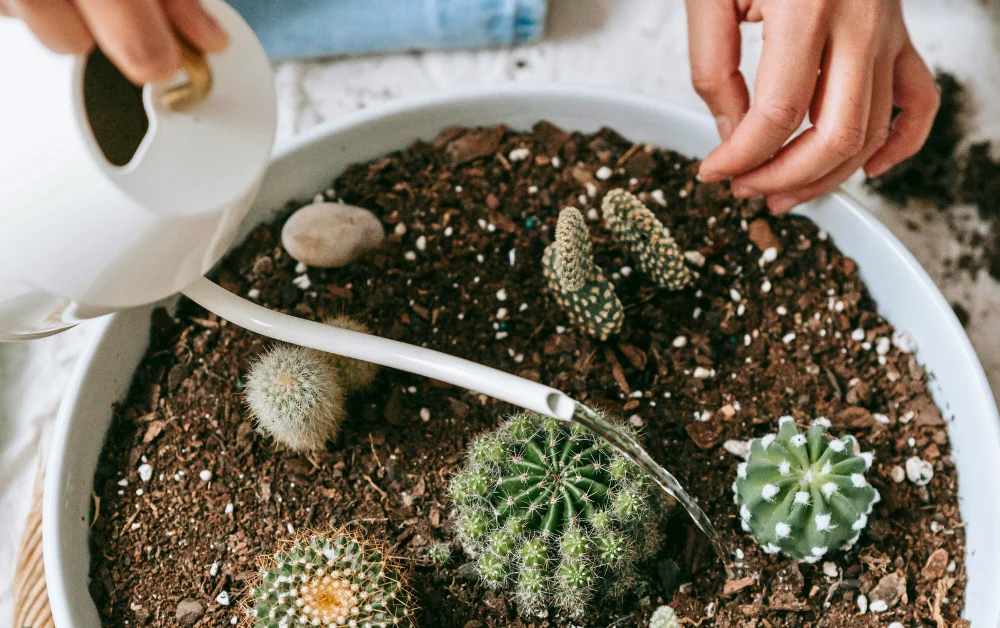
a person watering a cactus in a pot

1. Watering: Succulents store water in their leaves, so resist the urge to overwater. Water deeply only when the soil is completely dry to the touch. During winter, even less watering is needed.

2. Rotation: Rotate your plants regularly to ensure even growth on all sides. This is especially important under artificial light, as plants naturally lean towards the light source.

3. Feeding: While not essential, a balanced succulent fertilizer applied once or twice during the growing season (spring and summer) can give your plants a boost.

Troubleshooting Common Issues with Succulents:
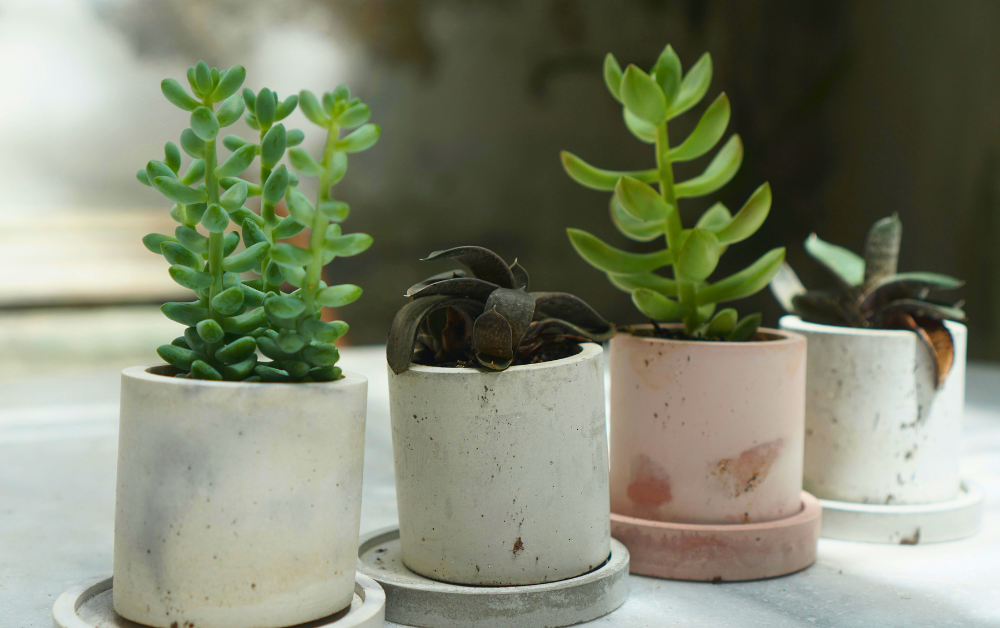
a group of potted succulent plants
  • Stretched or leggy growth: This indicates insufficient light. Move the grow light closer or increase the lighting duration.
  • Pale or washed-out colors: The light might be too strong. Increase the distance between the light and the succulents.
  • Sunburn: Brown or yellow spots on the leaves can be a sign of sunburn. Reduce the light intensity or duration.

Succulents are not only easy to grow and care for, they are also easy to propagate allowing you to expand your garden to be as large as you desire with little to no cost. There are two main ways to propagate succulents grown indoors: by leaf cuttings and by stem cuttings. Both methods are fairly simple and require minimal supplies.

Here’s what you’ll need for either method:

  • A healthy succulent plant
  • Sharp shears or pruners
  • Potting mix specifically designed for cacti and succulents (or a well-draining mix you create yourself)
  • Small pots with drainage holes

To Propagate Succulents by Leaf Cutting:
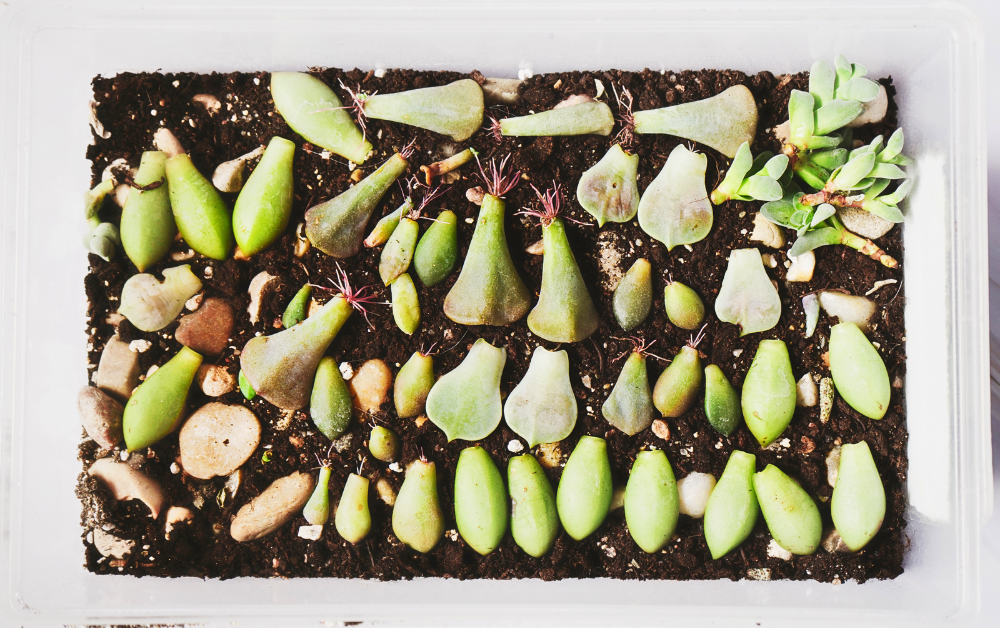
tray of succulents ready to propagate
  1. Pick a healthy leaf: Choose a plump, undamaged leaf from your plant. Gently twist or pull the leaf from the stem, taking care not to tear it.
  2. Let the leaf callous over: Place the leaf on a well-ventilated tray or paper towel in a warm, dry location away from direct light. Leave it for a few days (3-7) until the cut end forms a callus, which is a dry, scab-like scar.
  3. Planting the leaf (optional): You can plant the leaf directly on top of the succulent mix, or you can gently lay it on the soil with the calloused end barely touching the surface.
  4. Watering and care: Don’t water the leaf at this stage. Provide bright, indirect sunlight or place under a Happy Leaf LED grow light for 16 hours/day and wait patiently. Over time, roots will sprout from the calloused end, and a tiny new succulent plantlet will emerge from the base of the leaf.
  5. Potting the new plantlet: Once the new plantlet has developed its own roots and a few small leaves, you can gently pot it up in its own container with a succulent mix.

To Propagate Succulents by Stem Cutting:
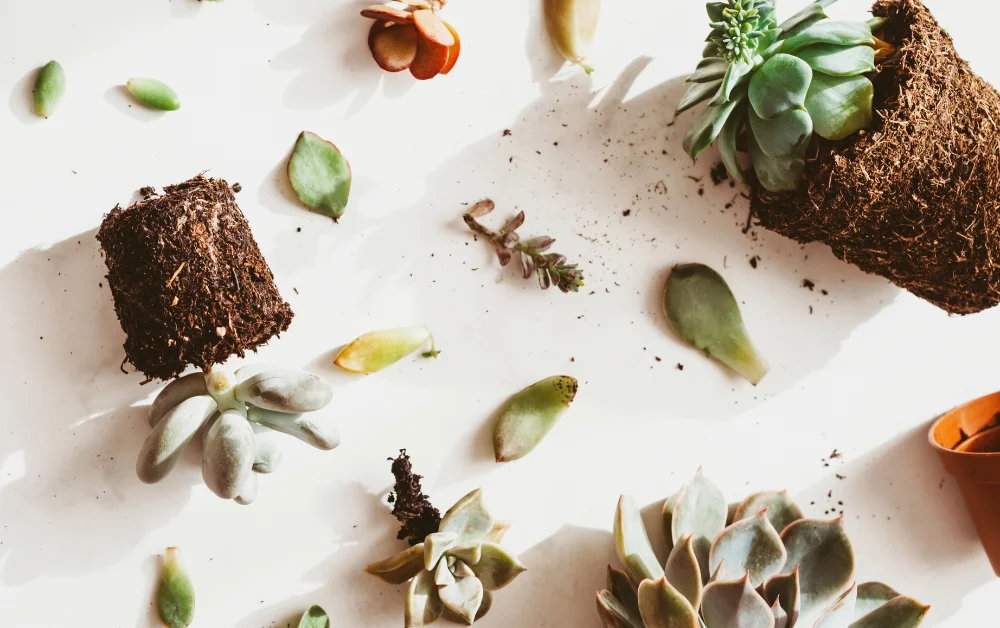
a group of succulent plants
  1. Take a stem cutting: Using sharp shears or pruners, cut off a healthy stem from your succulent, ideally just below a node (the bump where leaves grow). If the stem is leggy, you can cut it into sections, ensuring each section has at least one node.
  2. Let the cutting callous over: Similar to leaf cuttings, place the stem cutting on a tray or paper towel in a warm, dry location away from direct light for a few days (3-7) to allow the cut end to callus over.
  3. Planting the stem cutting: Once calloused, plant the stem cutting in a pot filled with succulent mix, burying the end where the leaves were removed.
  4. Watering and care: Water the soil lightly to settle it around the cutting. Provide bright, indirect sunlight and avoid overwatering. The cutting will develop roots over time and begin to grow new leaves.
  5. Repotting: Once the new succulent plant is established with a good root system, you can repot it into a larger container if desired.

Tips for successful succulent propagation:
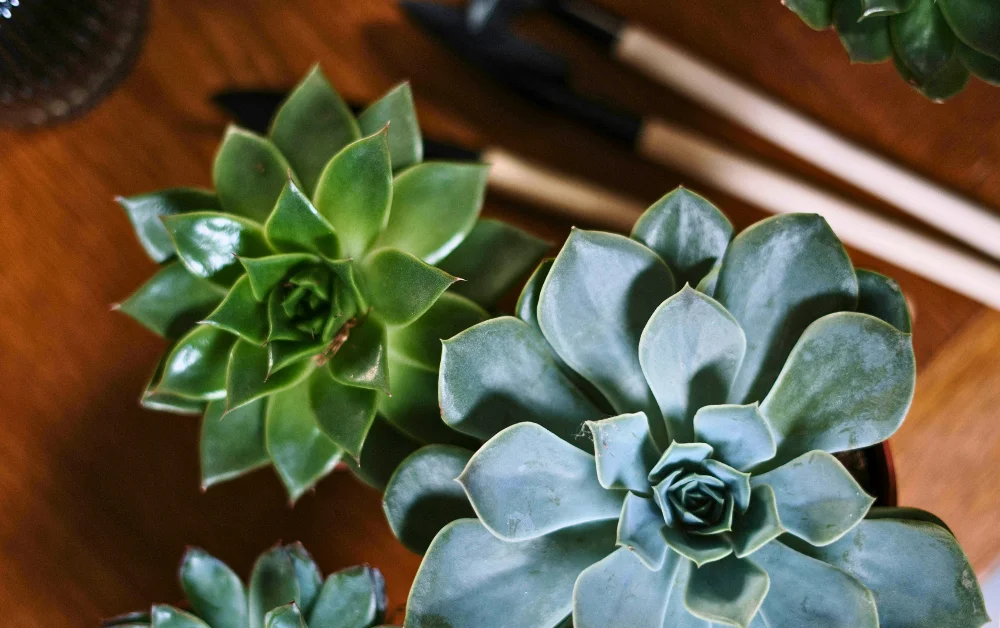
How to Care for and Propagate Succulents Successfully with LED Grow Lights 1
  • The best time to propagate succulents is during the spring or summer when they are actively growing.
  • Use sterilized tools to avoid introducing diseases to your plants.
  • When watering your newly propagated plant, err on the side of underwatering. Succulents are more prone to rot from overwatering than underwatering.
  • Be patient! Propagating succulents can take several weeks or even months to see successful results.

By following these steps and providing the right care, you can create a thriving indoor succulent garden using LED grow lights. Remember, succulents are relatively low-maintenance plants, so don’t be afraid to experiment and adjust your approach as needed. Soon, your home will be filled with the beauty and charm of these unique and resilient plants.

Want your succulents to grow bigger, faster and more colorful this year?

In this video, we tested how different kinds of grow lights and conditions affect the growth of your indoor succulents. You’ll see how our Happy Leaf LED Procyon PRO stacks up against our competitors as well as an indoor greenhouse setting. Join us as we dive into the details of what makes each light unique and how it affects your plants!

Posted on

Growing Spinach Indoors: A Beginners Guide

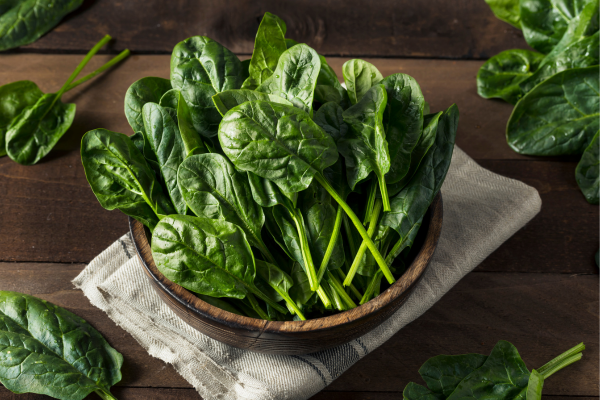
Bowl of Spinach Grown Indoors

Growing spinach outdoors is often limited by the seasons, with the plants thriving in cool weather but struggling in the heat of summer or the chill of winter. However, by growing spinach in your indoor garden, you can enjoy fresh, homegrown spinach year-round, free from the challenges of pests, bolting, and weather extremes. In this guide, we’ll go over the benefits, methods and materials needed . You’ll also receive a step-by-step guide that will give you the confidence to grow a thriving crop of spinach in your home, no matter the season.

Spinach in bowl on table

Growing spinach indoors offers a wealth of benefits:

  • Year-round availability: Harvest fresh spinach regardless of the season, enjoying its vibrant flavor and nutritional value.
  • Control over growing conditions: Optimize light, temperature, and nutrients for healthy, thriving spinach plants.
  • Reduced exposure to pests and diseases: Protect your spinach from outdoor threats and enjoy a cleaner, healthier harvest.
  • Convenience and space-efficiency: Grow indoors regardless of limited outdoor space, enjoying the satisfaction of homegrown spinach right at your fingertips.
  • Optimized for flavor and texture: Contrary to some expectations, food grown indoors can actually have a very appealing texture and flavor.

This guide specifically focuses on the use of Happy Leaf LED lights, renowned for their effectiveness in promoting healthy plant growth. Keep in mind that all grow lights are not the same.  Happy Leaf LED lights provide the perfect environment for your indoor spinach to flourish.

Preparing for Indoor Spinach Cultivation

Choosing the right container is crucial for successful indoor spinach cultivation. Consider the following:

  • Size: Opt for a container that is at least 6 inches deep and 12 inches wide to accommodate root growth. Self-watering vegetable planter boxes are ideal.
  • Drainage: Ensure the container has drainage holes to prevent waterlogging.
  • Material: Choose a material like clay, plastic, or fabric that is porous and allows for air circulation.
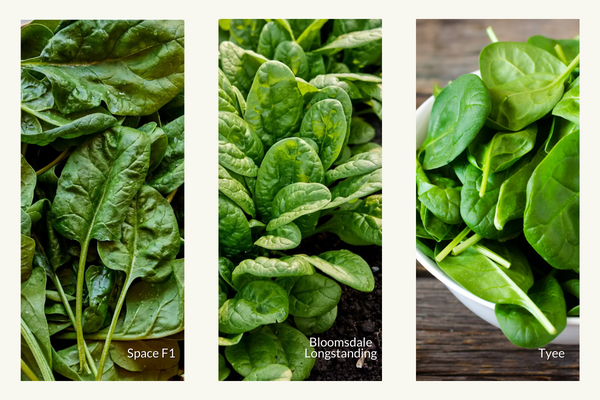
Indoor Spinach Varieties

Next, select a spinach variety that thrives indoors.

Popular choices include:

  • Space: A compact variety with short, upright leaves.
  • Bloomsdale Longstanding: A high-yielding variety with tender leaves.
  • Tyee: A fast-growing variety with smooth, dark green leaves.

Gather your supplies:

  • Medium: Choose a well-draining potting mix formulated for vegetables. Consider a 50/50 blend of coco coir and vermiculite.
  • Container: Self-watering vegetable planter box. 30” x 14” x 12” (deep) is an excellent size.
  • Nutrient: We recommend General Hydroponics MaxiGro 10-5-14
  • Happy Leaf LED grow lights: Select a grow light suitable for the size of your growing area. The 33” Procyon 2.0 is the perfect size for that vegetable planter box
  • Seeds: Purchase certified organic spinach seeds.
  • Timer: Automate the light cycle for consistent growth. 

Setting Up the Growing Environment

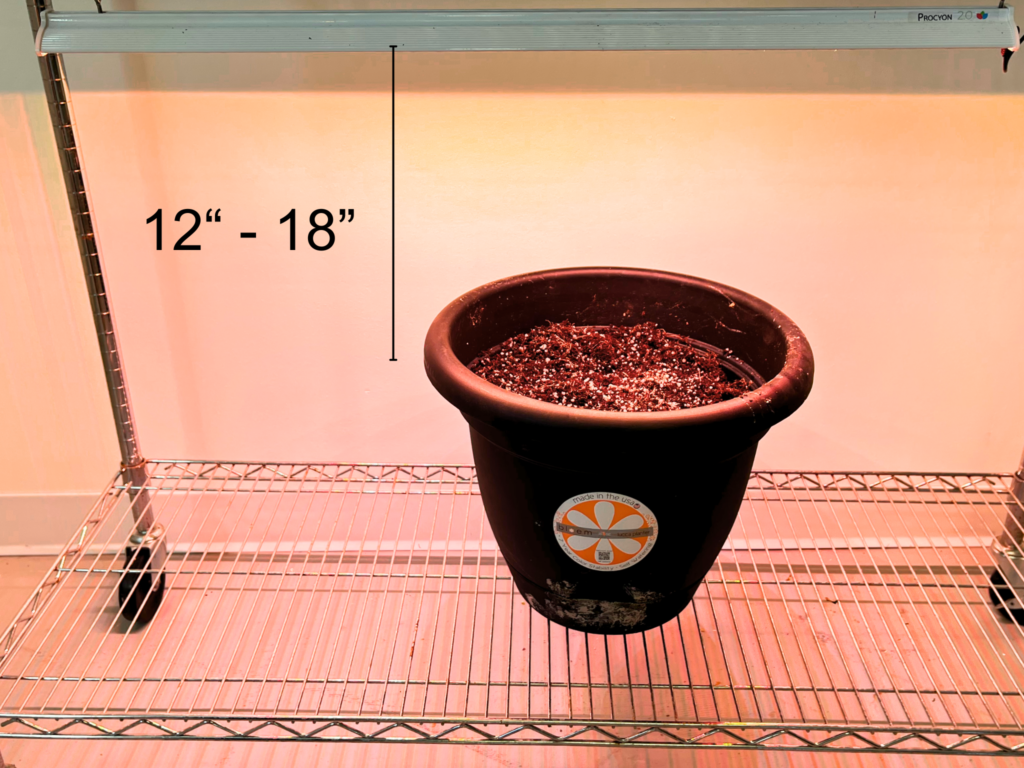
Spinach prefers a cool environment with temperatures between 60 and 75°F. Typically our homes are within this range. Place your Happy Leaf LED lights approximately 12-18 inches above the container. Aim for 14-16 hours of light per day. We recommend using a programmable timer so you don’t have to worry about turning your light off and on.

Growing Spinach Indoors: A Beginners Guide 2

Planting Spinach Seeds

1.Fill the container with potting mix medium, leaving 3” – 6” of space at the top.

Growing Spinach Indoors: A Beginners Guide 3

2.Moisten the medium with nutrient water.

Growing Spinach Indoors: A Beginners Guide 4

3. Fill the nutrient water reservoir if you’re using a self-watering container.

Growing Spinach Indoors: A Beginners Guide 5

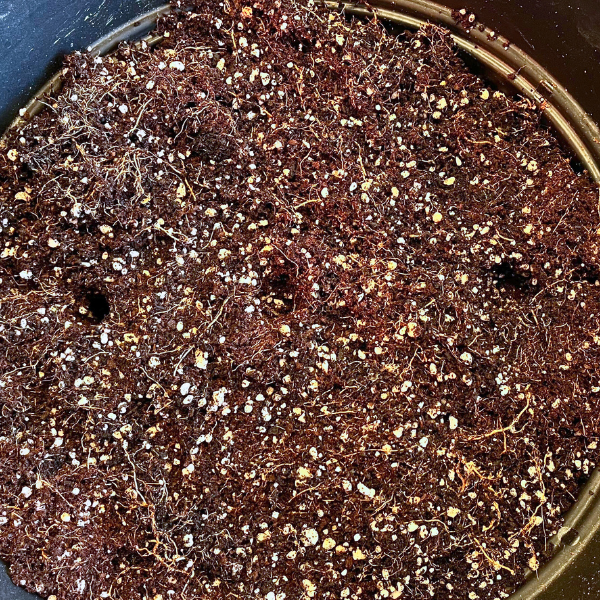
4. Sow seeds 1/2 inch deep, spacing them 2-3 inches apart.

Growing Spinach Indoors: A Beginners Guide 6

5. Cover the seeds lightly with medium and gently water again.

The first time you water will be from the top, after that, use the self-watering “trough” located near the bottom of the container.

Caring for Spinach Plants

If you’re using a self-watering container, check water levels every couple of days. Water your spinach plants deeply when the top inch of soil feels dry. Avoid overwatering, as this can lead to root rot.

Monitor your spinach plants closely and adjust the light settings if needed. As the plants grow, raise the lights to maintain the optimal distance.

Managing Pests and Diseases

Though less susceptible indoors, spinach can be affected by pests and diseases. Common threats include aphids, fungus gnats and fungal diseases.

Organic methods like insecticidal soap and neem oil can be effective in controlling pests. Small sticky traps are effective at controlling flying pests like fungus gnats. Maintain good sanitation and avoid overwatering to prevent fungal diseases. Read more about organic pest control on Roots & Refuge.

Harvesting Spinach

Growing Spinach Indoors

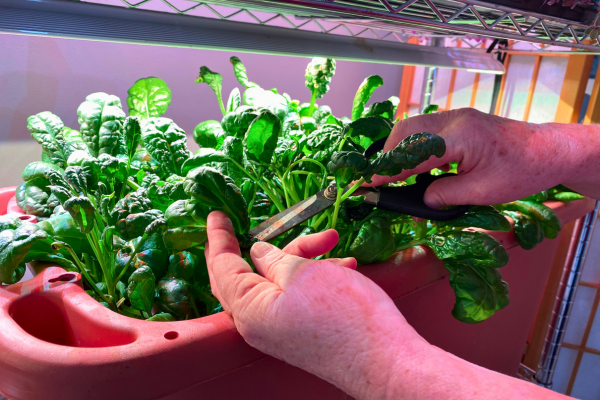
Spinach is ready for harvest when the leaves are 4-6 inches long and tender. Harvest individual leaves or cut the entire plant at the base with scissors.

Regular harvesting encourages new growth, ensuring a continuous supply of fresh spinach. Store harvested spinach in the refrigerator for up to 5 days.

Now that you’ve grown your own fresh spinach, take a look at the best pesto recipe ever!

Conclusion

Growing spinach indoors with Happy Leaf LED lights is a rewarding and accessible way to enjoy fresh, delicious spinach all year round. This guide provides a solid foundation for successful cultivation, empowering you to nurture thriving spinach plants in the comfort of your own home.

Want to grow tomatoes, peppers, succulents or learn about starting seeds? Click the highlighted links or visit Happy Leaf LEDs YouTube channel for a bunch of fun videos!

Posted on

A Kitchen Garden You’ll Love All Year

A Kitchen Garden You’ll Love All Year lady with lettuce on her head

We love our outdoor garden but in Northern Illinois, we only get to enjoy the harvest for a limited amount of time. Lucky for us, we enjoy beautiful greens, microgreens, and herbs all year round, even in winter when the snow is blowing when we grow with our USA Made LED grow lights!

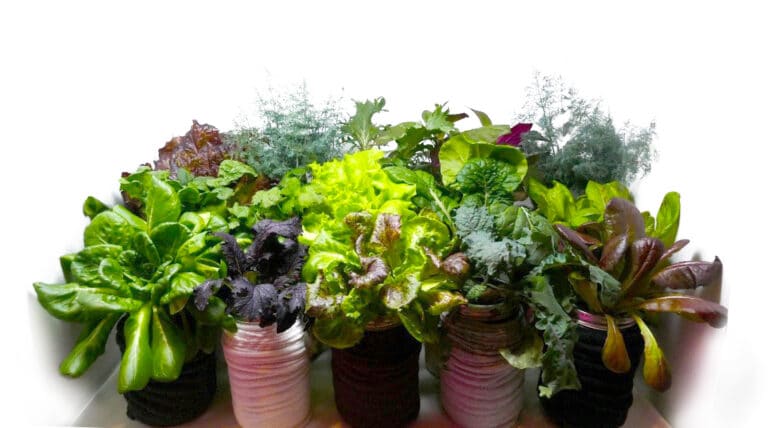
Photo of various leafy greens

This beautiful kitchen garden could be growing in your home very soon, any time of the year.

Why Grow An Indoor Kitchen Garden?

Because it:

  • won’t take up much space
  • is super convenient and easy to take care of
  • can be highly productive
  • helps you be self-reliant

The reality of always having fresh greens and herbs is truly a game-changer. You’ll wonder why not everyone is doing this.

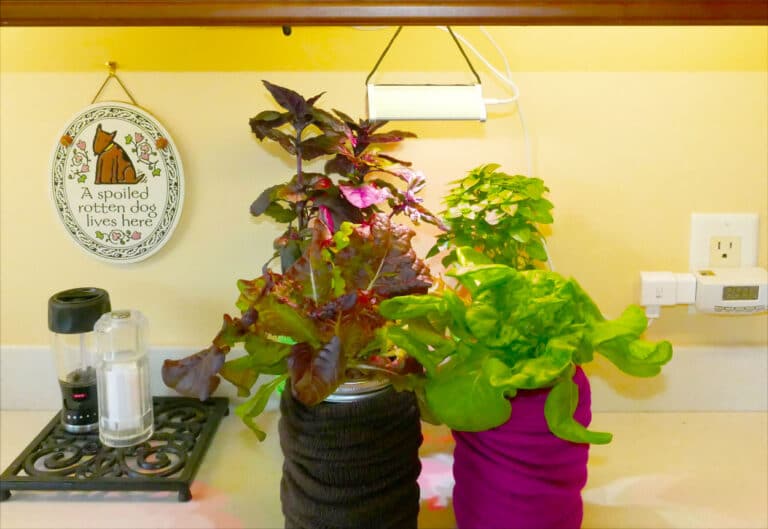
image of greens growing on a kithen counter
Even a small space and a small light can do wonders!

For your home, we emphasize growing greens, microgreens, and herbs to start with because they are the fastest growing, most renewable, and cost effective crops for a kitchen garden. When we talk about greens, remember that includes arugula, kale, bok choy and all manner of leafy goodness!  We are always having fun trying out new varieties of leafy greens – it’s wondrous how many there are.

If you avoid buying herbs at the store because they are expensive and don’t last long, well, that’s no longer a problem. We grow buckets full of our favorites, like basil and parsley, that last for months, and only cost pennies to grow. See how easy it is!

Here is a quick start guide we put together that explains the basic process we use to start seeds and grow these beautiful plants. 

Kitchen Gardening – Best Veggies To Grow

Spinach Is Not Just For Popeye Anymore!

Spinach

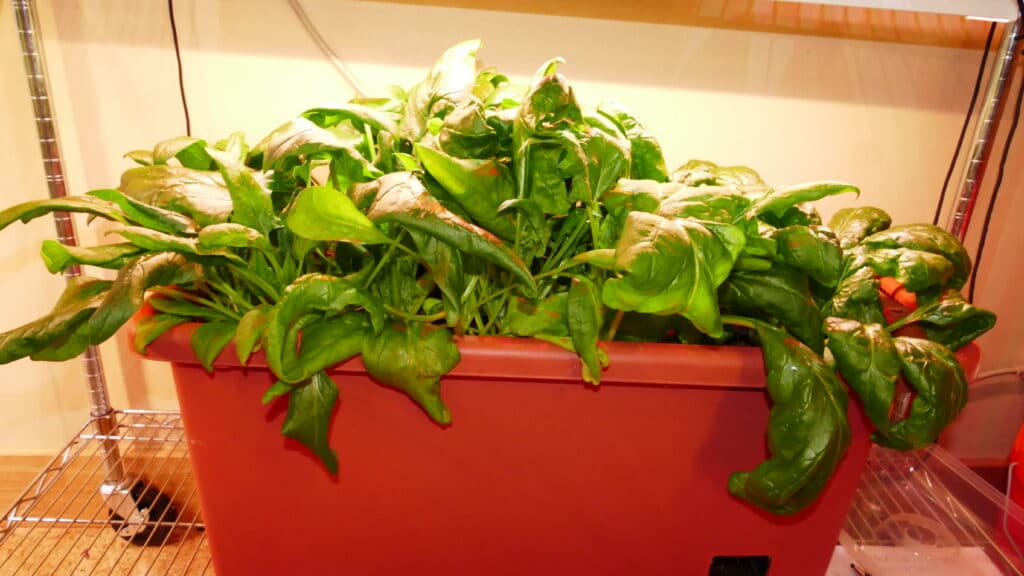
Spinach is a crop that many people ask about, and we admit it wasn’t working well in the jars for us. After having some fun with experimenting, we now have a really reliable growing method, using coconut coir and vermiculite. This makes it super easy to add it to your kitchen garden. The video with details on growing spinach will be linked to this blog in the very near future and it will be part of the YouTube videos.

Beets – Beets – Beets

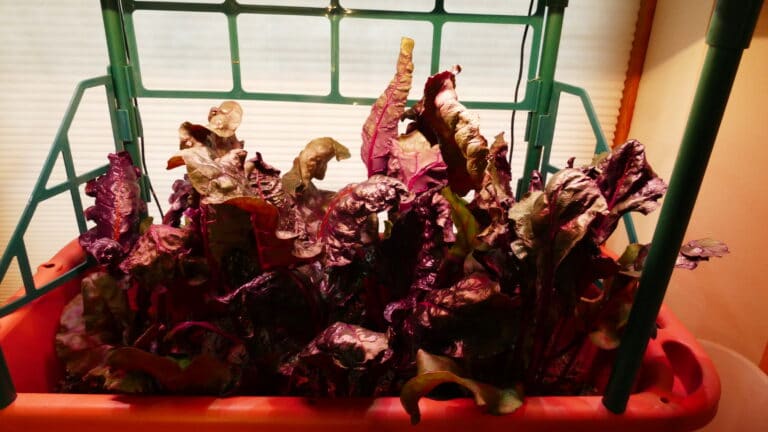
Beet Greens

There is so much goodness, deliciousness, and a lot of nutrition packed into each square inch of beet so it makes a lot of sense to grow them in your kitchen garden. While they are awesome all around, we are more interested in eating the beautiful, tender beet greens. When grown indoors they’re not half as tough as their outdoor cousins. Another upcoming video is about growing beets and other delicious root vegetables.  

Lettuce Inspire You to Grow Varieties of Greens!

image of greens in a jar

Allow us to introduce you to our friend, Pablo. As a long-time vegetarian, a once-commercial-grower-of-leafy-greens, and an avid home gardener, I have had my fair share of lettuce over the years. But my #1, all-time, most fave one of them all is Pablo. Pablo is beautiful, well-behaved, and tastes AH-MAzing. It also wins awards from me for regenerating super quickly after being harvested. An added bonus is that he has unique inverse-cup-shaped leaves that beg you to make lettuce wraps of them. Grow it.  You’ll love it.  We purchase the seeds from Seed Savers. Stay tuned for an upcoming blog in which we will provide you with several other “faves” in our greens lineup.

Learn from Happy Leaf!

Our YouTube channel has plenty of videos in which we share many details on our methods and on how to get your kitchen garden going. We have lots more videos in the production line as we hone our methods and ramp up production. Be sure to subscribe to our YouTube channel and turn on “notifications” (the little bell), so you’ll get notified when we post new videos.

Click here for an in-depth guide for all of your technical grow light questions.

We continue to experiment so that we can help anyone who wants to have an amazing indoor kitchen garden. We started a Facebook group called “Seed Starting and Plant Growth with Happy Leaf LEDs.” If you’re interested, just find the group and ask to join. We’re so impressed with those awesome things people are showing us and we enjoy answering questions as well.  

Please connect with us any way you like. Ask us questions and share your successes. We love hearing from you.

Happy Leaf LED is a proud member of The National Garden Bureau.

National Garden Bureau
Posted on

Late Season Seed Starting for Your Outdoor Garden

Seed Starting. Image of young woman holding broccoli in her hands

Late Season Seed Starting – You Still Have Time!

It’s early May and you may be thinking… There is no way I can start plants now!

Maybe you got anxious to plant outside (no judgement – who isn’t?) and your veggies got hit with frost. Maybe you couldn’t make it to the garden center in time, and they were all sold out. Or, just maybe, you didn’t have a chance to plant seeds earlier in the season. No reason to fret though because there is still time to start several seed varieties indoors that will let you enjoy harvest o’plenty later in the season. There are lots of vegetable plants that can still be started indoors for later planting outside.

So get ready for a great list of plants to start now! If you’d like a refresher, watch our in-depth seed starting bootcamp.

While it may seem counterintuitive to start seeds this late, the trick to helping the seedlings grow faster is using high-quality grow lights. Now, on to thinking about what to consider when making your choice about which plants to start now so you can enjoy a bounty of vegetables outside, even if you had a late start.

5 Types of Fast Growing Plants

Brassica

a close up of a cabbage cut in half

Members of the Brassica family are excellent choices because the plants germinate in less than a week and are ready to transplant in a few short weeks. These crops include:

  • Broccoli
  • Cabbage (Red and Green)
  • Kale
  • Kohlrabi
  • Brussel Sprouts
  • Cauliflower

The @wisconsinvegetablegardeners has a fantastic video on starting brassicas indoors!

Succession Crops

pile of multi-colored radishes

Those are crops that can be planted every 10-14 days to spread out the harvest by giving you several small crops instead of harvesting them all at once. These plants traditionally include:

  • Radish
  • Peas
  • Kale
  • Spinach
  • Lettuce
  • Beans
  • Carrots
  • Beets
  • Turnips
  • Onion
  • Chard
  • Collards

Fast Germinating Plants

fast germinating crop of squash

Another option for plants to start now are the ones that have a fast germination. Many of these are ones that can also be planted by direct sowing them into the garden. However, the number of days to be ready for transplant is generally shorter under Happy Leaf grow lights, so you can speed up the process by getting a jump start indoors. These crops include:

  • Corn
  • Cucumber
  • Summer Squash
  • Winter Squash
  • Pumpkin
  • Cantaloupe
  • Watermelon

Compact Vegetable Varieties

Even if you prefer plants like for instance tomatoes or peppers that typically have a longer germination and transplant time, it’s not too late to start those in your house now. There are compact vegetable varieties that have been bred to be smaller and therefore do well in containers. So, if they aren’t ready to harvest before the fall killing frost, you can always bring the container inside and place under your grow lights to finish them relatively quickly. Give some of the following a try:

  • Eggplant ‘Patio Baby’
  • Cucumber ‘Spacemaster’
  • Tomato ‘Tumbling Tom’
  • Tomato ‘Tiny Tim’
  • Tomato ‘Spring Giant’
  • Pepper ‘Jalapeno’
  • Pepper ‘Habanero’
  • Pepper ‘Keystone Resistant Giant’

Short Crop Cycle Plants

seedlings sprouting

There is still time to start some varieties of tomatoes and peppers that have a comparatively short crop cycle. You will find that information on the seed packet as “Days to Harvest”. A typical tomato takes about 70 days, some longer. Try the following ones that mature relatively quickly:

  • ‘Early Girl’ – it matures in just 50 days after planting
  • ‘Mountaineer Sweet Pepper’ – ready in 53 days to green or 68 days to red peppers

There are lots of plants that are ready more quickly than their “typical” counterparts. There is still time to sow any of those that have a “Days to Harvest” time of around 65 days or shorter.

Other Considerations

Notice that lettuce and herbs do not appear in any of these lists. Although there is still time to sow them in your outdoor garden, I simply find them so easy and foolproof to grow indoors that I haven’t grown them outside in several years. They stay disease and insect free, do not bolt, give you several crops when in an indoor controlled environment, and are unnecessary to wash. Best of all? It frees up space for some of your other favorite outdoor crops that need more room to grow.

Ready To Grow? I Know We Are…!

Now it’s decision time: Which seeds to pick? Which plants to start now? Only you know the answer. But here’s what we recommend: Get your pots and growing medium ready and let us know what you decided to grow – we’d love to hear from you! Get your grow on!

Happy Leaf LED is a proud member of The National Garden Bureau.

National Garden Bureau
Posted on

Let’s Garden!

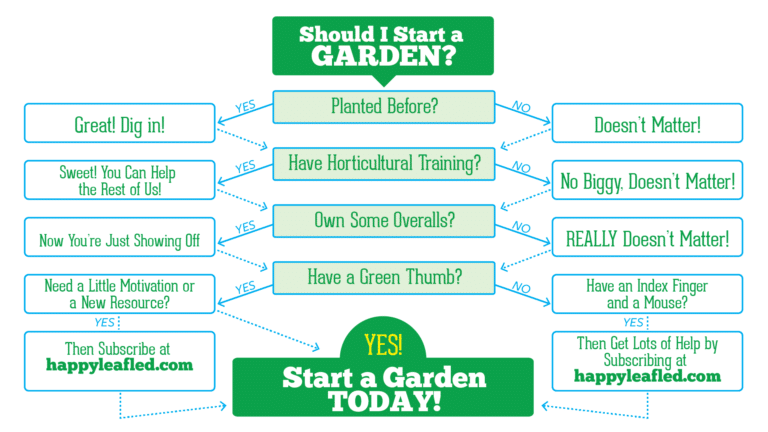
Should I Start Gardening, decision tree
epic gardening decision tree


Gardening has not been canceled!

Our message is that we want to help you garden, wherever works best for you, whether your garden is a single herb on your countertop or an expansive array of raised beds in the country. The point is, if you can do any level of gardening at all, your quality of life is going to improve.  And that’s what we want for everyone.

We are sharing some FREE or low-cost resources that can guide and inspire you to grow your own fresh, healthy and low-cost food. We have information for both types of gardening, indoors and outdoors!

“If you have a garden and a library, you have everything you need.” — Marcus Tullius Cicero.

Recommended Resources

Here is a list of resources that pertain primarily to seed-starting and gardening outdoors. When we want to learn more or be inspired by all things gardening online, we love to check in with all of these enthusiastic gardeners.

  • The local Extension Office – For us, it’s the University of Illinois Extension Office. Your state has one, too. These people are amazing. They have localized information about growing foods and gardening, among other things. We urge you to explore what your Extension Office is all about.
  • The Wisconsin Vegetable Gardener, (Joey and Holly Baird.) These dedicated educators have a multitude of videos and podcasts along with a radio show that is chocked full of DIY and expert gardening information. Fear not, much of the information they share can be applied if you live somewhere other than Wisconsin.
  • The Mike Nowak Show with Peggy Malecki. “The greenest show on the air or in the cloud.” Mike and Peggy have a radio show and podcasts that are entertaining and informative. Just the other day we learned that Service Berries might be the ideal way to satisfy our interest in growing blueberries since blueberries are almost impossible to grow where we live.
  • Petra Page-Mann, of Fruition Seeds, has a unique gift for sharing her insightful and inspiring take on all things related to seeds and growing. They have started offering webinars!
  • John Kohler’s “Growing Your Greens” on Youtube. We dare you to find someone more devoted to resourcefully growing and consuming healthy food with extreme dedication.
  • Joel Karsten knows plenty about straw bale gardens because he wrote a best-selling book titled, you guessed it, Straw Bale Gardens. Have you tried straw bale gardening yet? It’s pretty cool and a unique way to go about outdoor gardening.
  • Jeb the Gardener is quite the personality, with a unique take on everything. Lots of DIY ideas and a legit understanding of growing. We hope someday our videos are half as cool as his.

Happy Leaf LED Resources

We are keeping busy, so feel free to binge on all of the information we are generating.

We hope that some of the information we provide will be “share-worthy” – doing so helps us help you!

Read here: 6 Simple Solutions to Common to Common Indoor Gardening Questions

Final Words

You stuck with it!  Bravo.  We are digging in to help everyone garden more with minimal resources.  You may have heard of Victory Gardens – they are starting to trend again!  Victory gardens are memorable and noteworthy because they brought hope and real benefit to millions of people at a very uncertain time in history.

As we are, once again, at a pivotal point in history, we hope that the gardens we plant will be the victory we need.

Posted on

6 Indoor Gardening Solutions to Common Questions

Indoor Gardening - Simple Solutions to Common Questions skunk image
simple lightbulb on blue background

We’re pretty sure you won’t have a skunk problem in your indoor garden, so that’s a relief, but there are some common topics that arise when people embark on their indoor gardening adventures.  Or, even if you have already successfully grown food indoors, it doesn’t hurt to review some basic troubleshooting topics.

Most Common Indoor Gardening Questions Addressed

On occasion, we hear from customers who describe problems they have encountered when they are trying their hand at indoor gardening. Those questions may relate to seeds not germinating, plants being leggy or growing slowly.  Or, their plants just don’t look as robust as they would like.  

If you’re having any one of these common issues, we have compiled this list of reasons why you might not be getting the results you want when you embark on your indoor gardening adventure.

How Long Should Grow Lights Be On?

The minimum number of hours for running Happy Leaf LED grow lights for any plant is 12 hours, and we recommend 16 hours for most plants.  These lights are inexpensive to operate, so if you cut the hours you are only saving a few pennies.  For most plants, more hours with good light will induce faster growth.  Stay tuned for another blog on this topic as we have been digesting some recent university research on the topic of light duration!

What’s the Ideal Temperature for Growing Indoors?

The ideal growing environment for most plants is a consistent temperature range between 68 and 72 degrees F. Crops such as lettuce may grow at lower temperatures but a 50 degree garage will definitely slow down growth.  More warm loving plants may downright refuse to thrive if exposed to colder temps. Extreme heat is rarely the case with indoor gardening but can also provide less than desirable plants.  So, make sure you aren’t growing next to heat-generating sources such as a dryer, furnace or heat register.

This image has an empty alt attribute; its file name is 2-1024x538.jpg

Seed Quality

Make sure you are using fresh seed. All of us are guilty from time to time of pushing the envelope with older seeds. Ideally, store seeds in a moisture-proof container in a refrigerator.

Find an in-depth YouTube video on seed starting here.

What Type of Water Should I use?

Not a common problem, but it happens sometimes.

Hard water will contribute to mineral deposits, but softened water can also cause problems, so our best advice is to experiment with different types of water to see what impact they have on your plants. One trick is to get water from an outside spigot if you have softened water inside your building. An actual water test is the only way to know what is in your water, but most people don’t have to resort to this level of troubleshooting.

This image has an empty alt attribute; its file name is quality-1024x538.jpg

Quality of Light

Happy Leaf LEDs are designed to take a lot of the guesswork out of whether you have the right amount and quality of light on your plants. This topic can get very complicated, and we love to talk about it, so if you have in-depth questions about lighting, by all means reach out to us.  However, most people just want to know the light is going to work and if you’re using Happy Leaf LED’s, you can trust that they will.

Will My Indoor Garden Have Insects or Diseases

Far fewer problems arise with insects and diseases when you are gardening indoors, but you still have to be on the lookout. Insects and diseases are crafty and they do find their way to plants regardless of whether they are inside or outside, whether that’s through a window or traveling on a newly arrived plant or cutting. If you see a problem, remove or quarantine affected plants to minimize spread. Neem oil is a good tool for combating some pests and it does not harm humans.

Be sure to sanitize all of your materials thoroughly between crops.

We recommend a process of elimination, based on the above issues, to help diagnose any common problems with your indoor plants.  However, if you have a problem that isn’t solved through these tips, please get in touch with us!  We want you to have the indoor garden of your dreams.  Happy Growing!!!!!!!